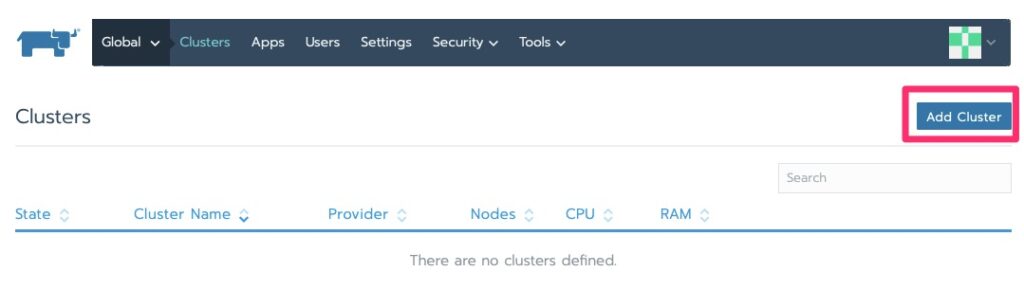
Spinning Up Kubernetes Easily with kubeadm init!

Summary

Some time ago when I was just learning Kubernetes, I wrote a series of articles that started with Intro To Kubernetes. This was on an earlier version (1.14) where many of these manual steps worked. Spinning up a new instance on 1.17, these steps really did not hold up and the cluster was not fully functional. I decided to give kubeadm init a try and it made my life infinitely easier.

Google does have a great install guide here that attempts to work for various operating systems but this article is specific to PhotonOS. Here is Google’s guide – https://kubernetes.io/docs/setup/production-environment/tools/kubeadm/install-kubeadm/

Provisioning

Many of the provisioning steps in Intro To Kubernetes are similar, if not the same. Instead of manually starting services on hardware though, kubeadm spins up a bit of it as pods which saves time.

For this lab we need a VM we will name kcp1 (Kubernetes Control Plane 1). Since most of the master/slave terminology is going by the wayside to be more sensitive to what it represented in the past, what was previously referred to as master is now a control plane. The nodes were almost always referred to as worker nodes so it makes sense.

kcp1 needs 2GB of RAM and 2 cores/vCPUs. kwn1 can get away with 1GB RAM and 1 core. For storage, since this is a test lab, 8GB is more than sufficient. For the OS, I still am using VMware Photon OS version 3. I choose the ISO and its a quick install – https://vmware.github.io/photon/. PhotonOS was chosen because it is highly optimized for being a VM and minimized to be a very light weight OS to run docker containers. These traits make it perfect for running Kubernetes.

Installing Packages

For this we will need the kubernetes and kubernetes-kubeadm packages installed. It also requires iptables and docker but that comes installed even on the minimal install.

tdnf install docker kubernetes kubernetes-kubeadm

Install and we’re off to the races! We’ll need this on kcp1 and kwn1.

Firewall Rules

In order for key parts of it to work, we’ll need to open a few firewall rules. This is done by editing /etc/systemd/scripts/ip4save and adding a few lines and then restarting iptables.

kcp1 needs the following line. This is for the API calls which must of the cluster makes to the control plane nodes.

-A INPUT -p tcp -m tcp --dport 6443 -j ACCEPT

kcp1 & kwn1 need the following. The first two are for Flannel’s Pod Network overlay. The last one is for the Kubelet service which runs on all nodes. Google provides a listing here of all ports but with Photon this is all we need – https://kubernetes.io/docs/setup/production-environment/tools/kubeadm/install-kubeadm/

-A INPUT -p udp -m udp --dport 8285 -j ACCEPT
-A INPUT -p udp -m udp --dport 8472 -j ACCEPT
-A INPUT -p tcp -m tcp --dport 10250 -j ACCEPT

It should look something like this afterwards

/etc/systemd/scripts/ip4save

Then a simple restart to make the rules take effect.

systemctl restart iptables

kubeadm init Magic!

The magic here is kubeadm init. We need to use something like flannel for the pod network overlay. We don’t get into that in this article but if we don’t pass the right flags for that into kubeadm init, it won’t work. Per flannel

This needs to first be run on the control plane node.

kubeadm init --pod-network-cidr=10.244.0.0/16

On our first run we get some errors about docker not running. We need to enable and start it!

systemctl enable docker
systemctl start docker

Giving kubeadm init another run and its off! It may appear to hang for a minute and then spew out lines of actions its performing.

It will then tell you some next steps. It may seem like a lot.

Your Kubernetes control-plane has initialized successfully!

To start using your cluster, you need to run the following as a regular user:

  mkdir -p $HOME/.kube
  sudo cp -i /etc/kubernetes/admin.conf $HOME/.kube/config
  sudo chown $(id -u):$(id -g) $HOME/.kube/config

You should now deploy a pod network to the cluster.
Run "kubectl apply -f [podnetwork].yaml" with one of the options listed at:
  https://kubernetes.io/docs/concepts/cluster-administration/addons/

Then you can join any number of worker nodes by running the following on each as root:

kubeadm join 192.168.83.15:6443 --token xspmbf.kko3d24t74rpaeyo \
    --discovery-token-ca-cert-hash sha256:483e0e6ef33580b2c8f1e61210e3f50d8163dc6312b5d89940e38236cd2f04b6 

For the most part these are copy and paste. The first three lines literally are so we’ll do that so we can use kubectl.

Minimal Configuration

One of the big remaining steps is to deploy a pod network, usually an overlay. As we mentioned earlier, I prefer flannel and it usually just works.

This just needs to be done via kubectl once. It instantiates a DaemonSet which essentially pushes this out to every node that attaches to the cluster.

kubectl apply -f https://raw.githubusercontent.com/coreos/flannel/master/Documentation/kube-flannel.yml

Over on kwn1 we can run the join command it listed. It will take a little bit of time and then be done. Once done it recommends doing a “kubectl get nodes”.

root@kcp1 [ ~ ]# kubectl get nodes
NAME STATUS ROLES AGE VERSION
kcp1 Ready master 6m35s v1.17.11
kwn1 Ready 32s v1.17.11

Validation

You can also check all the running pods to see the health. All is well and pretty turn key.

kubectl get pods -A
kubectl get pods -A

Final Thoughts

We have a working cluster that was fairly turn key and much easier than my earlier attempts. If you are fairly new to Kubernetes I would recommend deploying the dashboard which I outline Kubernetes Dashboard. This is mostly correct except that the version 2.0 is no longer beta and has a final release that works pretty well now.

Unit Testing Golang on App Engine

Summary

If you have landed here, it is most likely because you attempted to implement the subject and ran into errors. In my use case, I ran into errors when splitting up my Golang app into packages and added unit testing to it. To compound it, I was automatically deploying via triggers with CloudBuild.

This builds upon the article IP Subnet Calculator on Google App Engine. Reading that article will help give you a good reference point for this article.

This article is not a “How To” on actual unit testing but getting it to work under this unique combination of tools. A great unit testing article I found is here – https://blog.alexellis.io/golang-writing-unit-tests/

How To Setup

Before we talk about what might have gone wrong, let’s talk about how to set this up properly. There has been a lot of confusion since Golang went to version 1.11 and started supporting modules. After supporting modules it appears using GOPATH is a less of a supported method. With that said some tools still look for it.

Directory Structure

To get a final state visual of my directory structure, it ended up as follows

tools.woohoosvcs.com
tools.woohoosvcs.com/app.yaml
tools.woohoosvcs.com/go.mod
tools.woohoosvcs.com/subnetcalculator
tools.woohoosvcs.com/subnetcalculator/subnetcalculator.go
tools.woohoosvcs.com/subnetcalculator/subnetcalculator_test.go
tools.woohoosvcs.com/cloudbuild.yaml
tools.woohoosvcs.com/html
tools.woohoosvcs.com/html/root.html
tools.woohoosvcs.com/html/view.html
tools.woohoosvcs.com/README.md
tools.woohoosvcs.com/static
tools.woohoosvcs.com/static/submitdata.js
tools.woohoosvcs.com/static/subnetcalculator.css
tools.woohoosvcs.com/root
tools.woohoosvcs.com/root/root.go
tools.woohoosvcs.com/main.go

Modules

Modules help with the dependency needs of Golang applications. Previously, private packages were difficult to manage as well as specific versioned public packages. Modules helps many of these issues. Here is a good article on modules – https://blog.golang.org/using-go-modules

The key to my issues seemed to be involving modules. Google App Engine’s migrating to 1.11 guide recommends the following.

The preferred method is to manually move all http.HandleFunc() calls from your packages to your main()function in your main package.

Alternatively, import your application’s packages into your main package, ensuring each init() function that contains calls to http.HandleFunc() gets run on startup.

https://cloud.google.com/appengine/docs/standard/go111/go-differences

My app’s directory is “tools.woohoosvcs.com” so I named the root, the same. Run “go mod init”

$ go mod init tools.woohoosvcs.com
go: creating new go.mod: module tools.woohoosvcs.com
dwcjr@Davids-MacBook-Pro tools.woohoosvcs.com % cat go.mod
module tools.woohoosvcs.com

go 1.13

Importing Private Packages

This then lets us to refer to packages and modules under it via something similar.

import ( "tools.woohoosvcs.com/subnetcalculator" )

CloudBuild

My cloudbuild.yaml ended up as follows

steps:
  - id: subnetcalculator_test
    name: "gcr.io/cloud-builders/go"
    args: ["test","tools.woohoosvcs.com/subnetcalculator"]
    #We use modules but this docker wants GOPATH set and they are not compatible.
    env: ["GOPATH=/fakepath"]
  - name: "gcr.io/cloud-builders/gcloud"
    args: ["app", "deploy"]

Interesting tidbit is the “name” is a docker image from Google Cloud Repository or gcr.io

The first id runs the “go” image and runs “go test tools.woohoosvcs.com/subnetcalculator”. It seems the go image wants GOPATH but go test fails with it set so I had to set it to something fake.

It then uses the gcloud deployer which consumes app.yaml

How I Got Here

Unit tests drove me to wanting to split out logic, particularly the subnetcalculator (check it out via https://tools.woohoosvcs.com/subnetcalculator )

Before implementing modules I could get it to run locally by importing ./subnetcalculator but then “gcloud app deploy” would fail.

2019/11/22 01:39:13 Failed to build app: Your app is not on your GOPATH, please move it there and try again.
building app with command '[go build -o /tmp/staging/usr/local/bin/start ./...]', env '[PATH=/go/bin:/usr/local/go/bin:/builder/google-cloud-sdk/bin/:/usr/local/sbin:/usr/local/bin:/usr/sbin:/usr/bin:/sbin:/bin HOSTNAME=ace17fcba136 HOME=/builder/home BUILDER_OUTPUT=/builder/outputs DEBIAN_FRONTEND=noninteractive GOROOT=/usr/local/go/ GOPATH=/go GOPATH=/tmp/staging/srv/gopath]': err=exit status 1, out=go build: cannot write multiple packages to non-directory /tmp/staging/usr/local/bin/start.

The error was vague but I noticed it was related to the import path. I tried moving the folder to $GOPATH/src and it seemed to deploy via “gcloud app deploy” but then failed via CloudBuild automated trigger.

------------------------------------ STDERR ------------------------------------
2019/11/21 21:31:39 staging for go1.13
2019/11/21 21:31:39 GO111MODULE=auto, but no go.mod found, so building with dependencies from GOPATH
2019/11/21 21:31:39 Staging second-gen Standard app (GOPATH mode): failed analyzing /workspace: cannot find package "tools.woohoosvcs.com/subnetcalculator" in any of:
	($GOROOT not set)
	/builder/home/go/src/tools.woohoosvcs.com/subnetcalculator (from $GOPATH)
GOPATH: /builder/home/go
--------------------------------------------------------------------------------

ERROR
ERROR: build step 0 "gcr.io/cloud-builders/gcloud" failed: exit status 1

It was like a balancing act with a 3 legged chair! Once I initialized the module though and adjusted the imports it worked great

Final Worlds

Here we worked through a best practice of using modules and an internal package to do automated build deploy on Google App Engine. Unit testing with automated deploys are important so that broken builds do not get pushed to production.

Cloud-Init on Google Compute Engine

Summary

Yesterday I was playing a bit with Google Load Balancers and they tend to work best when you connect them to an automated instance group. I may touch on that in another article but in short that requires some level of automation. In an instance group, it will attempt to spin up images automatically. Based on health checks, it will introduce them to the load balanced cluster.

The Problem?

How do we automate provisioning? I have been touching on SaltStack in a few articles . Salt is great for configuration management but in an automated fashion, how do you get Salt on there? This was my goal. To get Salt Installed on a newly provisioned VM.

Method

Cloud-init is a very widely known method of provisioning a machine. From my brief understanding it started with Ubuntu and then took off. In Spinning Up Rancher With Kubernetes, I was briefly exposed to it. It makes sense and is widely supported. The concept it simple. Have a one time provisioning of the server.

Google Compute Engine

Google Compute Engine or GCE does support pushing cloud-init configuration (cloud-config) using metadata. You can set the “user-data” field and if cloud-init is installed it will be able to find this.

The problem is the only image that seems to support this out of the box is Ubuntu and my current preferred platform is CentOS although this is starting to change.

Startup Scripts

So if we don’t have cloud-init, what can we do? Google does have the functionality for startup and shutdown scripts via “startup-script” and “shutdown-script” meta fields. I do not want a script that runs every time. I also do not want to re-invent the wheel writing a failsafe script that will push salt-minion out and reconfigure it. For this reason I came up with a one time startup script.

The Solution

Startup Script

This is the startup script I came up with.

#!/bin/bash

if ! type cloud-init > /dev/null 2>&1 ; then
  echo "Ran - `date`" >> /root/startup
  sleep 30
  yum install -y cloud-init

  if [ $? == 0 ]; then
    echo "Ran - Success - `date`" >> /root/startup
    systemctl enable cloud-init
    #systemctl start cloud-init
  else
    echo "Ran - Fail - `date`" >> /root/startup
  fi

  # Reboot either way
  reboot
fi

This script checks to see if cloud-init exists. If it does, move along and don’t waste cpu. If it does not, we wait 30 seconds and install it. Upon success, we enable and either way we reboot.

Workaround

I played with this for a good part of a day, trying to get it working. Without the wait and other logging logic in the script, the following would happen.

2019-11-14T18:04:37Z DEBUG DNF version: 4.0.9
2019-11-14T18:04:37Z DDEBUG Command: dnf install -y cloud-init
2019-11-14T18:04:37Z DDEBUG Installroot: /
2019-11-14T18:04:37Z DDEBUG Releasever: 8
2019-11-14T18:04:37Z DEBUG cachedir: /var/cache/dnf
2019-11-14T18:04:37Z DDEBUG Base command: install
2019-11-14T18:04:37Z DDEBUG Extra commands: ['install', '-y', 'cloud-init']
2019-11-14T18:04:37Z DEBUG repo: downloading from remote: AppStream
2019-11-14T18:05:05Z DEBUG error: Curl error (7): Couldn't connect to server for http://mirrorlist.centos.org/?release=8&arch=x86_64&repo=AppStream&infra=stock [Failed to connect to mirrorlist.centos.org port 80: Connection timed out] (http://mirrorlist.centos.org/?release=8&arch=x86_64&repo=AppStream&infra=stock).
2019-11-14T18:05:05Z DEBUG Cannot download 'http://mirrorlist.centos.org/?release=8&arch=x86_64&repo=AppStream&infra=stock': Cannot prepare internal mirrorlist: Curl error (7): Couldn't connect to server for http://mirrorlist.centos.org/?release=8&arch=x86_64&repo=AppStream&infra=stock [Failed to connect to mirrorlist.centos.org port 80: Connection timed out].
2019-11-14T18:05:05Z DDEBUG Cleaning up.
2019-11-14T18:05:05Z SUBDEBUG
Traceback (most recent call last):
  File "/usr/lib/python3.6/site-packages/dnf/repo.py", line 566, in load
    ret = self._repo.load()
  File "/usr/lib64/python3.6/site-packages/libdnf/repo.py", line 503, in load
    return _repo.Repo_load(self)
RuntimeError: Failed to synchronize cache for repo 'AppStream'

During handling of the above exception, another exception occurred:

Traceback (most recent call last):
  File "/usr/lib/python3.6/site-packages/dnf/cli/main.py", line 64, in main
    return _main(base, args, cli_class, option_parser_class)
  File "/usr/lib/python3.6/site-packages/dnf/cli/main.py", line 99, in _main
    return cli_run(cli, base)
  File "/usr/lib/python3.6/site-packages/dnf/cli/main.py", line 115, in cli_run
    cli.run()
  File "/usr/lib/python3.6/site-packages/dnf/cli/cli.py", line 1124, in run
    self._process_demands()
  File "/usr/lib/python3.6/site-packages/dnf/cli/cli.py", line 828, in _process_demands
    load_available_repos=self.demands.available_repos)
  File "/usr/lib/python3.6/site-packages/dnf/base.py", line 400, in fill_sack
    self._add_repo_to_sack(r)
  File "/usr/lib/python3.6/site-packages/dnf/base.py", line 135, in _add_repo_to_sack
    repo.load()
  File "/usr/lib/python3.6/site-packages/dnf/repo.py", line 568, in load
    raise dnf.exceptions.RepoError(str(e))
dnf.exceptions.RepoError: Failed to synchronize cache for repo 'AppStream'
2019-11-14T18:05:05Z CRITICAL Error: Failed to synchronize cache for repo 'AppStream'

Interestingly it would work on the second boot. I posted on ServerFault about this. – https://serverfault.com/questions/991899/startup-script-centos-8-yum-install-no-network-on-first-boot. I will try to update this article if it goes anywhere as the “sleep 30” is annoying. The first iteration had a sleep 10 and it did not work.

It was strange because I could login and manually run the debug on it and it would succeed.

sudo google_metadata_script_runner --script-type startup --debug

Cloud-Init

Our goal was to use this right? Cloud-Init has a nice module for installing and configuring Salt – https://cloudinit.readthedocs.io/en/latest/topics/modules.html#salt-minion

#cloud-config

yum_repos:
    salt-py3-latest:
        baseurl: https://repo.saltstack.com/py3/redhat/$releasever/$basearch/latest
        name: SaltStack Latest Release Channel Python 3 for RHEL/Centos $releasever
        enabled: true
        gpgcheck: true
        gpgkey: https://repo.saltstack.com/py3/redhat/$releasever/$basearch/latest/SALTSTACK-GPG-KEY.pub

salt_minion:
    pkg_name: 'salt-minion'
    service_name: 'salt-minion'
    config_dir: '/etc/salt'
    conf:
        master: salt.example.com
    grains:
        role:
            - web

This sets up the repo for Salt. I prefer their repo over Epel as Epel tends to be dated. It then sets some simple salt-minion configs to get it going!

How do you set this?

You can set this two ways. One is from the command line if you have the SDK.

% gcloud compute instances create test123-17 --machine-type f1-micro --image-project centos-cloud --image-family centos-8 --metadata-from-file user-data=cloud-init.yaml,startup-script=cloud-bootstrap.sh

Or you can use the console and paste it in plain text.

GCE - Automation - Startup and user-data
GCE – Automation – Startup and user-data

Don’t feel bad if you can’t find these settings. They are buried here.

Finding Automation Settings

Final Words

In this article we walked through automating the provisioning. You can use cloud-init for all sorts of things such as ensuring its completely up to date before handing off as well as adding users and keys. For our need, we just wanted to get Salt on there so it could plug into config management.

SaltStack – Assisting Windows Updates With win_wua

Summary

Today I got to play with the Salt win_wua module. Anyone that manages Windows servers, they know all about the second Tuesday of the month. the win_wua module can help greatly. I have recently been toying with Salt as mentioned in some of my other articles like Introduction to SaltStack.

Update Methodology

In the environments I manage, we typically implement Microsoft Windows Server Update Services (WSUS) but in a manual fashion so that we can control the installation of the patches. WSUS is more of a gatekeeper against bad patches. We approve updates immediate to only test servers. This lets us burn them in for a few weeks. Then when we’re comfortable, we push them to production. This greatly helped mitigate this conflict of Windows Updates – https://community.sophos.com/kb/en-us/133945

The process to actually install though is manual since we need to trigger the install. It involved manually logging into various servers to push the install button and then reboot. In my past complaints of this I was unable to find something to easily trigger the installation of windows updates.

Win_wua to the rescue

I originally thought I would need a salt state to perform this but the command line module is so easy, I did not bother.

salt TESTSERVER win_wua.list
TESTSERVER:
    ----------
    9bc4dbf1-3cdf-4708-a004-2d6e60de2e3a:
        ----------
        Categories:
            - Security Updates
            - Windows Server 2012 R2
        Description:
            Install this update to resolve issues in Windows. For a complete listing of the issues that are included in this update, see the associated Microsoft Knowledge Base article for more information. After you install this item, you may have to restart your computer.
        Downloaded:
.....

It then spews a ton of data related to the pending updates to be installed. Luckily it has an option for a summary. Surprisingly we use the same “list” to install by setting a flag. The install function expects a list of updates you wish to install but we just want to install all pending ones.

Before we install, check out the summary output

salt TESTSERVER win_wua.list summary=True
TESTSERVER:
    ----------
    Available:
        0
    Categories:
        ----------
        Security Updates:
            4
        Windows Server 2012 R2:
            4
    Downloaded:
        4
    Installed:
        0
    Severity:
        ----------
        Critical:
            3
        Moderate:
            1
    Total:
        4

Ok so let’s install and only see the summary

salt -t 60 LV-PSCADS01 win_wua.list summary=True install=True
LV-PSCADS01:
    Passed invalid arguments to win_wua.list: 'int' object is not callable
    
        .. versionadded:: 2017.7.0
    
        Returns a detailed list of available updates or a summary. If download or
        install is True the same list will be downloaded and/or installed.

Well that’s no fun! Not quite what we expected. It appears its a known bug on 2017.7.1 and fixed. Update your salt minion or perform the manual fix it listed and run again!

salt -t 60 TESTSERVER win_wua.list summary=True install=True
TESTSERVER:
    ----------
    Download:
        ----------
        Success:
            True
        Updates:
            Nothing to download
    Install:
        ----------
        Message:
            Installation Succeeded
        NeedsReboot:
            True
        Success:
            True
        Updates:
            ----------
            9bc4dbf1-3cdf-4708-a004-2d6e60de2e3a:
                ----------
                AlreadyInstalled:
                    False
                RebootBehavior:
                    Never Reboot
                Result:
                    Installation Succeeded
                Title:
                    2019-11 Servicing Stack Update for Windows Server 2012 R2 for x64-based Systems (KB4524445)
            9d665242-c74c-4905-a6f4-24f2b12c66e6:
                ----------
                AlreadyInstalled:
                    False
                RebootBehavior:
                    Poss Reboot
                Result:
                    Installation Succeeded
                Title:
                    2019-11 Cumulative Security Update for Internet Explorer 11 for Windows Server 2012 R2 for x64-based systems (KB4525106)
            a30c9519-8359-48e1-86d4-38791ad95200:
                ----------
                AlreadyInstalled:
                    False
                RebootBehavior:
                    Poss Reboot
                Result:
                    Installation Succeeded
                Title:
                    2019-11 Security Only Quality Update for Windows Server 2012 R2 for x64-based Systems (KB4525250)
            a57cd1d3-0038-466b-9341-99f6d488d84b:
                ----------
                AlreadyInstalled:
                    False
                RebootBehavior:
                    Poss Reboot
                Result:
                    Installation Succeeded
                Title:
                    2019-11 Security Monthly Quality Rollup for Windows Server 2012 R2 for x64-based Systems (KB4525243)

Of course, this is windows so we need a reboot. By default the win_system.reboot waits 5 minutes to reboot. With the flags below we can shorten that.

salt TESTSERVER system.reboot timeout=30 in_seconds=True

Salt State

If I wanted to automate the reboot after the update install, I could make this a state and check for the updates to trigger a reboot. In my scenario, I do not need it but if you want to try, check out this section for the win_wua states. The syntax is slightly different than the module we have been working with on this article.

Updating Multiple Server

If you want to update multiple servers at once you can do something like the following. The -L flag lets you set multiple targets as a comma separated

salt -t 60 -L TESTSERVER,TESTSERVER2,TESTSERVER3 win_wua.list summary=True install=True

salt -L TESTSERVER,TESTSERVER2,TESTSERVER3 system.reboot timeout=30 in_seconds=True

We could even set a salt grain to group these

salt -L TESTSERVER,TESTSERVER2,TESTSERVER3 grains.set wua_batch testservers
salt -G wua_batch:testservers win_wua.list summary=True install=True
salt -G wua_batch:testservers system.reboot timeout=30 in_seconds=True

Throttling

If you are running this on prem or just flat out want to avoid an update and boot storm, you can throttle it using “salt -b” as mentioned in Salt’s documentation.

# This would limit the install to 2 servers at a time
salt -b 2 -G wua_batch:testservers win_wua.list summary=True install=True

Final Words

This article is likely only good if you have salt in your environment somewhere but never thought about using it on Windows. It is a great tool at configuration management on Windows but most Windows admins think of other tools like GPO, SCCM, etc to manage Windows.

Salt State – Intro to SaltStack Configuration

Summary

This article picks up from Configuration Management – Introduction to SaltStack and dives into Salt State. It assumes you have an installed and working SaltStack. I call this intro to SaltStack configuration because this is the bulk of salt. Setting up the salt states and configuration. Understanding the configuration files, where they go and the format is the most important part of Salt.

The way I learn is a guided tour with a purpose and we will be doing just that. Our goal is first to create a salt state that installs apache.

Prepping Salt – Configuration

We need to modify “/etc/salt/master” and uncomment the following

#file_roots:
#  base:
#    - /srv/salt
#

This is where the salt states will be stored. Then we want to actually create that directory.

mkdir /srv/salt

vi /etc/srv/salt/webserver.sls

The contents of webserver.sls are as follows

httpd:
  pkg:
    - installed

This is fairly simple. We indicate a state “apache”, and define that package should be installed. We can apply it specifically as follows.

Applying Our First Salt State

# salt saltmaster1.woohoosvcs.com state.apply webserver
[WARNING ] /usr/lib/python3.6/site-packages/salt/transport/zeromq.py:42: VisibleDeprecationWarning: zmq.eventloop.minitornado is deprecated in pyzmq 14.0 and will be removed.
    Install tornado itself to use zmq with the tornado IOLoop.
    
  import zmq.eventloop.ioloop

saltmaster1.woohoosvcs.com:
----------
          ID: httpd
    Function: pkg.installed
      Result: True
     Comment: The following packages were installed/updated: httpd
     Started: 16:31:35.154411
    Duration: 21874.957 ms
     Changes:   
              ----------
              apr:
                  ----------
                  new:
                      1.6.3-9.el8
                  old:
              apr-util:
                  ----------
                  new:
                      1.6.1-6.el8
                  old:
              apr-util-bdb:
                  ----------
                  new:
                      1.6.1-6.el8
                  old:
              apr-util-openssl:
                  ----------
                  new:
                      1.6.1-6.el8
                  old:
              centos-logos-httpd:
                  ----------
                  new:
                      80.5-2.el8
                  old:
              httpd:
                  ----------
                  new:
                      2.4.37-12.module_el8.0.0+185+5908b0db
                  old:
              httpd-filesystem:
                  ----------
                  new:
                      2.4.37-12.module_el8.0.0+185+5908b0db
                  old:
              httpd-tools:
                  ----------
                  new:
                      2.4.37-12.module_el8.0.0+185+5908b0db
                  old:
              mailcap:
                  ----------
                  new:
                      2.1.48-3.el8
                  old:
              mod_http2:
                  ----------
                  new:
                      1.11.3-3.module_el8.0.0+185+5908b0db
                  old:

Summary for saltmaster1.woohoosvcs.com
------------
Succeeded: 1 (changed=1)
Failed:    0
------------
Total states run:     1
Total run time:  21.875 s

You’ll note 1) the annoying warning which I will be truncating from further messages but 2) that it installed httpd (apache). You can see it also installed quite a few other dependencies that apache required.

Let’s validate quickly

# systemctl status httpd
● httpd.service - The Apache HTTP Server
   Loaded: loaded (/usr/lib/systemd/system/httpd.service; disabled; vendor preset: disabled)
   Active: inactive (dead)
     Docs: man:httpd.service(8)

# ls -la /etc/httpd/
total 12
drwxr-xr-x.  5 root root  105 Nov 10 16:31 .
drwxr-xr-x. 80 root root 8192 Nov 10 16:31 ..
drwxr-xr-x.  2 root root   37 Nov 10 16:31 conf
drwxr-xr-x.  2 root root   82 Nov 10 16:31 conf.d
drwxr-xr-x.  2 root root  226 Nov 10 16:31 conf.modules.d
lrwxrwxrwx.  1 root root   19 Oct  7 16:42 logs -> ../../var/log/httpd
lrwxrwxrwx.  1 root root   29 Oct  7 16:42 modules -> ../../usr/lib64/httpd/modules
lrwxrwxrwx.  1 root root   10 Oct  7 16:42 run -> /run/httpd
lrwxrwxrwx.  1 root root   19 Oct  7 16:42 state -> ../../var/lib/httpd

Looks legit to me! We just installed our first salt state. You can “yum remove” httpd and apply again and it will install. The real power in configuration management is that it knows the desired state and will repeatedly get you there. It is not just a one and done. This is the main difference between provisioning platforms and configuration management.

Installing More Dependencies

WordPress also needs “php-gd” so let’s modify the salt state to add it and then reapply.

httpd:
  pkg:
    - installed

php-gd:
  pkg:
    - installed

Here you can see it did not try to reinstall apache but did install php-gd.

# salt saltmaster1.woohoosvcs.com state.apply webserver

saltmaster1.woohoosvcs.com:
----------
          ID: httpd
    Function: pkg.installed
      Result: True
     Comment: All specified packages are already installed
     Started: 16:41:36.742596
    Duration: 633.359 ms
     Changes:   
----------
          ID: php-gd
    Function: pkg.installed
      Result: True
     Comment: The following packages were installed/updated: php-gd
     Started: 16:41:37.376211
    Duration: 20622.985 ms
     Changes:   
              ----------
              dejavu-fonts-common:
                  ----------
                  new:
                      2.35-6.el8
                  old:
              dejavu-sans-fonts:
                  ----------
                  new:
                      2.35-6.el8
                  old:
              fontconfig:
                  ----------
                  new:
                      2.13.1-3.el8
                  old:
              fontpackages-filesystem:
                  ----------
                  new:
                      1.44-22.el8
                  old:
              gd:
                  ----------
                  new:
                      2.2.5-6.el8
                  old:
              jbigkit-libs:
                  ----------
                  new:
                      2.1-14.el8
                  old:
              libX11:
                  ----------
                  new:
                      1.6.7-1.el8
                  old:
              libX11-common:
                  ----------
                  new:
                      1.6.7-1.el8
                  old:
              libXau:
                  ----------
                  new:
                      1.0.8-13.el8
                  old:
              libXpm:
                  ----------
                  new:
                      3.5.12-7.el8
                  old:
              libjpeg-turbo:
                  ----------
                  new:
                      1.5.3-7.el8
                  old:
              libtiff:
                  ----------
                  new:
                      4.0.9-13.el8
                  old:
              libwebp:
                  ----------
                  new:
                      1.0.0-1.el8
                  old:
              libxcb:
                  ----------
                  new:
                      1.13-5.el8
                  old:
              php-common:
                  ----------
                  new:
                      7.2.11-1.module_el8.0.0+56+d1ca79aa
                  old:
              php-gd:
                  ----------
                  new:
                      7.2.11-1.module_el8.0.0+56+d1ca79aa
                  old:

Summary for saltmaster1.woohoosvcs.com
------------
Succeeded: 2 (changed=1)
Failed:    0
------------
Total states run:     2
Total run time:  21.256 s

The output of state.apply is rather long so we likely will not post too many more. With that said, I wanted to give you a few examples of the output and what it looks like.

Downloading Files

Next we need to download the WordPress files. The latest version is always available via https://wordpress.org/latest.tar.gz. Salt has a Salt State for managed file to download but it requires us to know the hash of the file to ensure it is correct. Since “latest” would change from time to time, we do not know what that is. We have two options. The first is to store a specific version on the salt server and provide that. The second is to use curl to download the file.

download_wordpress:
  cmd.run:
    - name: curl -L https://wordpress.org/latest.tar.gz -o /tmp/wp-latest.tar.gz
    - creates: /tmp/wp-latest.tar.gz

In order for salt to not download the file every time, we need to tell it what the command we are running will store. We tell it, it creates the “/tmp/wp-latest.tar.gz” so it should only download if that file does not exist.

Downloading is not all we need to do though, we also need to extract it.

Extracting

extract_wordpress:
  archive.extracted:
    - name: /tmp/www/
    - source: /tmp/wp-latest.tar.gz
    - user: apache
    - group: apache

The archive.extracted module allows us to specify a few important parameters that are helpful. Applying the state we can see its there!

[root@saltmaster1 salt]# ls -la /tmp/www/
total 4
drwxr-xr-x.  3 apache root     23 Nov 10 16:57 .
drwxrwxrwt. 11 root   root    243 Nov 10 16:59 ..
drwxr-xr-x.  5 apache apache 4096 Oct 14 15:37 wordpress

We actually want it in the “/var/www/html” root so the webserver.sls was modified to the following.

extract_wordpress:
  archive.extracted:
    - name: /var/www/html
    - source: /tmp/wp-latest.tar.gz
    - user: apache
    - group: apache
    - options: "--strip-components=1"
    - enforce_toplevel: False

The issue is the tar has the “wordpress” directory as the root and we want to strip that off. We need the options to pass to tar to strip it. We also need the enforce_toplevel to false as Salt expects a singular top level folder. I found this neat trick via https://github.com/saltstack/salt/issues/54012

# Before
# ls -la /var/www/html/wp-config*
-rw-r--r--. 1 apache apache 2898 Jan  7  2019 /var/www/html/wp-config-sample.php
# salt saltmaster1.woohoosvcs.com state.apply webserver

# After
# ls -la /var/www/html/wp-config*
-rw-r-----. 1 apache apache 2750 Nov 10 18:03 /var/www/html/wp-config.php
-rw-r--r--. 1 apache apache 2898 Jan  7  2019 /var/www/html/wp-config-sample.php

Sourcing the Config

We now have a stock WordPress install but we need to configure it to connect to the database.

For that I took a production wp-config.php and placed it in “/srv/salt/wordpress/wp-config.php” on the salt master. I then used the following salt state to push it out

/var/www/html/wp-config.php:
  file.managed:
  - source: salt://wordpress/wp-config.php
  - user: apache
  - group: apache
  - mode: 640

Set Running Salt State

What could would Apache do if it weren’t running. We do need a salt state to enable and run it!

start_webserver:
  service.running:
  - name: httpd
  - enable: True
# systemctl status httpd
● httpd.service - The Apache HTTP Server
   Loaded: loaded (/usr/lib/systemd/system/httpd.service; enabled; vendor preset: disabled)
   Active: active (running) since Sun 2019-11-10 18:27:24 CST; 1min 5s ago

Final Words

Through this we configured a webserver.sls salt state. We used it to install apache and a basic php module necessary as well as push out a configuration file. As you can likely tell from these instructions, it is an iterative approach to configuring the salt state for your need.

This first iteration of the webserver.sls is far from complete or best practice. It is meant as a beginner’s guide to walking through the thought process. Below is the full webserver.sls file for reference

httpd:
  pkg:
    - installed

php-gd:
  pkg:
    - installed

download_wordpress:
  cmd.run:
    - name: curl -L https://wordpress.org/latest.tar.gz -o /tmp/wp-latest.tar.gz
    - creates: /tmp/wp-latest.tar.gz

extract_wordpress:
  archive.extracted:
    - name: /var/www/html
    - source: /tmp/wp-latest.tar.gz
    - user: apache
    - group: apache
    - options: "--strip-components=1"
    - enforce_toplevel: False

/var/www/html/wp-config.php:
  file.managed:
  - source: salt://wordpress/wp-config.php
  - user: apache
  - group: apache
  - mode: 640

start_webserver:
  service.running:
  - name: httpd
  - enable: True

Configuration Management – Intro to SaltStack

Summary

SaltStack or Salt for short is an open source configuration management platform. It was first released in the early 2010’s as a potential replacement for Chef and Puppet. In this guide we will walk through some high level details of Salt and a basic install. If you already have Salt installed, please skip ahead to the next article when it is published.

Next – Salt State – Intro to SaltStack Configuration

What is Configuration Management?

A configuration management tool allows you to remotely configure and dictate configurations of machines. Through this multi-part series we will work through that with the use case of https://blog.woohoosvcs.com/. At some point this site may need multiple front ends. It has not been decided if that method will be Kubernetes, Google App Engine or VMs. If the VM route is chosen it will make sense to have an easy template to use.

What Configuration Management is not

Configuration management typically does not involve the original provisioning of the server. There are typically other tools for that such as Terraform.

Salt Architecture

Salt has three main components to achieve configuration management. Those are the salt master, minion and client. Salt can be configured highly available with multi master but it is not necessary to start out there. For the sake of this document and per Salt’s best practices we can add that later if necessary. – https://docs.saltstack.com/en/latest/topics/development/architecture.html

Salt Client

The salt client is a command line client that accepts commands to be issued to the salt master. It is typically on the salt master. You can use it to trigger expected states.

Salt Master

The Salt Master is the broker of all configuration management and the brains. Requests/commands received from the client make their way to the master which then get pushed to the minion.

Salt Minion

The minion is typically loaded onto each machine you wish to perform configuration management on. In our case, it will be the new front ends we spin up as we need them.

Firewall Ports

The Salt Master needs ports TCP/4505-4506 opened. The minions check in and connect to the master on those ports. No ports are needed for the minions as they do not listen on ports.

More on this can be found on their firewall page – https://docs.saltstack.com/en/latest/topics/tutorials/firewall.html

Where to install

Typically you want the master to be well connected since the minions will be connecting to it. Even if you are primarily on prem, it is not a bad idea to put a salt master in the cloud.

Installing Salt

Prerequisites

OS: CentOS 8
VM: 1 core, 1 GB RAM, 12 GB HDD
Install: Minimal

Installation

For the installation we will be closely following Salt’s documentation on installing for RHEL 8 – https://repo.saltstack.com/#rhel

For the sake of this lab we will have the client, master and minion all on the same server but it will allow us to build out the topology.

Now to the install!

# I always like to start out with the latest up to date OS
sudo yum update

# Install the salt repo for RHEL/CentOS
sudo yum install https://repo.saltstack.com/py3/redhat/salt-py3-repo-latest.el8.noarch.rpm

# Install minion and master
sudo yum install salt-master salt-minion

# Reboot for OS updates to take effect
reboot

Post Install Configuration

We need to setup a few things first. The Salt guide is great at pointing these out – https://docs.saltstack.com/en/latest/ref/configuration/index.html

On the minion we need to edit “/etc/salt/minion”. The following changes need to be made. If/when you roll this out into production you can use DNS hostnames.

#master: salt
master: 192.168.116.186

We will also open up the firewall ports on the master

firewall-cmd --permanent --zone=public --add-port=4505-4506/tcp
firewall-cmd --reload

Start up Configuration Management Tools

Now we are ready to start up and see how it runs!

sudo systemctl enable salt-master salt-minion
sudo systemctl start salt-master salt-minion

Wait about 5 minutes. It takes a little bit to initialize. Once it has you can run “sudo salt-key -L”. When a minion connects to the master, the master does not allow it to connect automatically. It has to be permitted/admitted. salt-key can be used to list minions and allow them.

$ sudo salt-key -L
Accepted Keys:
Denied Keys:
Unaccepted Keys:
saltmaster1.woohoosvcs.com
Rejected Keys:

$ sudo salt-key -A
The following keys are going to be accepted:
Unaccepted Keys:
saltmaster1.woohoosvcs.com
Proceed? [n/Y] Y
Key for minion saltmaster1.woohoosvcs.com accepted.
[dwcjr@saltmaster1 ~]$ sudo salt-key -L
Accepted Keys:
saltmaster1.woohoosvcs.com
Denied Keys:
Unaccepted Keys:
Rejected Keys:

We used salt-key -A to accept all unaccepted keys.

Testing

$ sudo salt saltmaster1 test.version
[WARNING ] /usr/lib/python3.6/site-packages/salt/transport/zeromq.py:42: VisibleDeprecationWarning: zmq.eventloop.minitornado is deprecated in pyzmq 14.0 and will be removed.
    Install tornado itself to use zmq with the tornado IOLoop.
    
  import zmq.eventloop.ioloop

No minions matched the target. No command was sent, no jid was assigned.
ERROR: No return received
[root@saltmaster1 ~]# salt '*' test.version
[WARNING ] /usr/lib/python3.6/site-packages/salt/transport/zeromq.py:42: VisibleDeprecationWarning: zmq.eventloop.minitornado is deprecated in pyzmq 14.0 and will be removed.
    Install tornado itself to use zmq with the tornado IOLoop.
    
  import zmq.eventloop.ioloop

saltmaster1.woohoosvcs.com:
    2019.2.2

Well that is an ugly error code. It seems to have been introduced in 2019.2.1 but not properly fixed in 2019.2.2. My guess is the next release will fix this but it seems harmless. – https://github.com/saltstack/salt/issues/54759. We do, however, get the response so this is a success.

Final Words

At this point we have a salt-master and salt-minion setup, albeit on the same host. We have accepted the minion on the master and they are communicating. The next article will start to tackle setting up Salt states and other parts of the salt configuration.

Next – Salt State – Intro to SaltStack Configuration

Spinning Up Rancher With Kubernetes

Summary

The Rancher ecosystem is an umbrella of tools. We will specifically be talking about the Rancher product or sometimes referred to as Rancher Server. Rancher is an excellent tool for managing and monitoring your Kubernetes cluster, no matter where it exists.

Requirements and Setup

The base requirement is just a machine that has docker. For the sake of this article, we will use their RancherOS to deploy.

RancherOS touts itself at being the lightest weight OS capable of running docker. All of the system services have been containerized as well. The most difficult part of installing “ros” is using the cloud-init.yaml to push your keys to it!

We will need the installation media as can be found here

The minimum requirements state 1GB of RAM but I had issues with that and bumped my VM up to 1.5GB. It was also provisioned with 1 CPU Core and 4GB HDD.

A cloud-config.yml should be provisioned with your ssh public key

#cloud-config
ssh_authorized_keys:
  - ssh-rsa XXXXXXXXXXXXXXXXXXXXXXXXXXXXX

We also assume you will be picking up from the Intro to Kubernetes article and importing that cluster.

Installing RacherOS

Autologin prompt on rancheros

On my laptop I ran the following command in the same directory that I have the cloud-config.yml. This is a neat way to have a quick and dirty web server on your machine.

python -m SimpleHTTPServer 8000

In the rancher window

sudo ros install -c http://192.168.116.1:8000/cloud-config.yml -d /dev/sda

A few prompts including a reboot and you will be asking yourself if it was just that easy? When it boots up, it shows you the IP to make it that much easier to remotely connect. Afterall, you are only enabled for ssh key auth at this point and cannot really login at the console.

Rancher Second Boot
Rancher Second Boot
 % ssh [email protected]
The authenticity of host '192.168.116.182 (192.168.116.182)' can't be established.
ECDSA key fingerprint is SHA256:KGTRt8HZu1P4VFp54vOAxf89iCFZ3jgtmdH8Zz1nPOA.
Are you sure you want to continue connecting (yes/no)? yes
Warning: Permanently added '192.168.116.182' (ECDSA) to the list of known hosts.
Enter passphrase for key '/Users/dwcjr/.ssh/id_rsa': 
[rancher@rancher ~]$ 

Starting Up Rancher

And we’re in! We will then do a single node self-signed cert install per – https://rancher.com/docs/rancher/v2.x/en/installation/single-node/

[rancher@rancher ~]$ docker run -d --restart=unless-stopped \
> -p 80:80 -p 443:443 \
> rancher/rancher:latest
Unable to find image 'rancher/rancher:latest' locally
latest: Pulling from rancher/rancher
22e816666fd6: Pull complete 
079b6d2a1e53: Pull complete 
11048ebae908: Pull complete 
c58094023a2e: Pull complete 
8a37a3d9d32f: Pull complete 
e403b6985877: Pull complete 
9acf582a7992: Pull complete 
bed4e005ec0d: Pull complete 
74a2e9817745: Pull complete 
322f0c253a60: Pull complete 
883600f5c6cf: Pull complete 
ff331cbe510b: Pull complete 
e1d7887879ba: Pull complete 
5a5441e6019b: Pull complete 
Digest: sha256:f8751258c145cfa8cfb5e67d9784863c67937be3587c133288234a077ea386f4
Status: Downloaded newer image for rancher/rancher:latest
76742197270b5154bf1e21cf0ba89479e0dfe1097f84c382af53eab1d13a25dd
[rancher@rancher ~]$ 

Connect via HTTPS to the rancher server and you’ll get the new user creation for admin

Welcome to Rancher!
Welcome to Rancher!

The next question is an important design decision. The Kubernetes nodes that this will be managing need to be able to connect to the rancher host. the reason being is agents are deployed that phone home. The warning in this next message is ok for this lab.

Rancher Server URL
Rancher Server URL

Importing a Cluster

Add Kubernetes Cluster
Add Cluster
Import Existing Cluster

In this lab I have been getting the following error but click over to clusters and it moves on with initializing.

Failed while: Wait for Condition: InitialRolesPopulated: True

It will stay in initializing for a little bit. Particularly in this lab with minimal resources. We are waiting for “Pending”.

Now that it is pending we can edit it for the kubectl command to run on the nodes to deploy the agent

Pending is good.  Now we want to edit.
Pending is good. Now we want to edit.
Copy the bottom option to the clipboard since we used a self-signed cert that the Kubernetes cluster does not trust.

Deploying the Agent

Run the curl!

root@kube-master [ ~ ]# curl --insecure -sfL https://192.168.116.182/v3/import/zdd55hx249cs9cgjnp9982zd2jbj4f5jslkrtpj97tc5f4xk64w27c.yaml | kubectl apply -f -
clusterrole.rbac.authorization.k8s.io/proxy-clusterrole-kubeapiserver created
clusterrolebinding.rbac.authorization.k8s.io/proxy-role-binding-kubernetes-master created
namespace/cattle-system created
serviceaccount/cattle created
clusterrolebinding.rbac.authorization.k8s.io/cattle-admin-binding created
secret/cattle-credentials-79f50bc created
clusterrole.rbac.authorization.k8s.io/cattle-admin created
deployment.apps/cattle-cluster-agent created
The DaemonSet "cattle-node-agent" is invalid: spec.template.spec.containers[0].securityContext.privileged: Forbidden: disallowed by cluster policy

Boo – what is “disallowed by cluster policy”? This is a permission issue

On Kubernetes 1.14 you can set “–allow-privileged=true” on the apiserver and kubelet. It is deprecated in higher versions. Make that change on our 1.14 cluster and we’re off to the races!

root@kube-master [ ~ ]# vi /etc/kubernetes/apiserver
root@kube-master [ ~ ]# vi /etc/kubernetes/kubelet
root@kube-master [ ~ ]# systemctl restart kube-apiserver.service kubelet.service 
root@kube-master [ ~ ]# curl --insecure -sfL https://192.168.116.182/v3/import/zdd55hx249cs9cgjnp9982zd2jbj4f5jslkrtpj97tc5f4xk64w27c.yaml | kubectl apply -f -
clusterrole.rbac.authorization.k8s.io/proxy-clusterrole-kubeapiserver unchanged
clusterrolebinding.rbac.authorization.k8s.io/proxy-role-binding-kubernetes-master unchanged
namespace/cattle-system unchanged
serviceaccount/cattle unchanged
clusterrolebinding.rbac.authorization.k8s.io/cattle-admin-binding unchanged
secret/cattle-credentials-79f50bc unchanged
clusterrole.rbac.authorization.k8s.io/cattle-admin unchanged
deployment.apps/cattle-cluster-agent unchanged
daemonset.apps/cattle-node-agent created

Slow races but we’re off. Give it a good few minutes to make some progress. While we wait for this node to provision, set the “–allow-privileged=true” on the other nodes in /etc/kubernetes/kubelet

We should now see some nodes and the status has changed to “waiting” and we will do just that. By now, if you haven’t realized, Kubernetes is not “fast” on the provisioning. Well at least in these labs with minimal resources 🙂

Cluster Status Waiting and nodes exist.

Checking on the status I ran into this. My first thought was RAM on the master node. I have run into this enough before.

This cluster is currently Provisioning; areas that interact directly with it will not be available until the API is ready.
Exit status 1, unable to recognize "management-state/tmp/yaml-705146024": the server is currently unable to handle the request unable to recognize "management-state/tmp/yaml-705146024"
This cluster is currently Provisioning; areas that interact directly with it will not be available until the API is ready.
Exit status 1, unable to recognize “management-state/tmp/yaml-705146024”: the server is currently unable to handle the request unable to recognize “management-state/tmp/yaml-705146024”

Sure enough, running top and checking the console confirmed that.

kube-master out of ram.

kube-master out of ram. Time to increase a little to cover the overhead of the agent. Went from 768MB to 1024MB and back up and at ’em!

It did sit at the following error for some time.

This cluster is currently Provisioning; areas that interact directly with it will not be available until the API is ready.
Exit status 1, unable to recognize "management-statefile_path_redacted":

Some indications show this eventually resolves itself. Others have indicated adding a node helps kick off the provisioning to continue. In my case a good 10 minutes and we’re all green now!

Rancher Cluster Dashboard!
Rancher Cluster Dashboard

Navigating Around

We saw the cluster area. Let’s drill into the nodes!

Rancher Dashboard Nodes
Rancher partitions the clusters into System and Default.  This is a carryover from "ros" which does the same to the OS.
Rancher partitions the clusters into System and Default. This is a carryover from “ros” which does the same to the OS.
Rancher Projects and Namespaces

Final Words

Rancher extends the functionality of Kubernetes, even on distributions of Kubernetes that are not Rancher. Those extensions are beyond the scope of this article. At the end of this article though you have a single node Rancher management tool that can manage multiple clusters. We did so with RancherOS. Should you want to do this in production it is recommended to have a “management” Kubernetes cluster to make rancher highly available and use a certificate truted by Kubernetes, from the trusted CA cert.

When shutting down this lab, I saw that the kube-node1/2 ran out of memory and I had to increase them to 1GB as well for future boots to help avoid this.

Kubernetes Dashboard

Summary

Now that we’ve stood up a majority of the framework we can get to some of the fun stuff. Namely Kubernetes Dashboard. Due to compatibility reasons we will be using 2.0beta1. Newer 2.0 betas are not well tested and I ran into some issues with our 1.14 that Photon comes with.

Download and Install

This is short and sweet. As usual, I like to download and then install. I didn’t like the name of this file though so I renamed it.

curl -O https://raw.githubusercontent.com/kubernetes/dashboard/v2.0.0-beta1/aio/deploy/recommended.yaml

mv recommended.yaml dashboard-2b1.yaml

kubectl apply -f dashboard-2b1.yaml 
namespace/kubernetes-dashboard created
serviceaccount/kubernetes-dashboard created
service/kubernetes-dashboard created
secret/kubernetes-dashboard-certs created
secret/kubernetes-dashboard-csrf created
secret/kubernetes-dashboard-key-holder created
configmap/kubernetes-dashboard-settings created
role.rbac.authorization.k8s.io/kubernetes-dashboard created
clusterrole.rbac.authorization.k8s.io/kubernetes-dashboard created
rolebinding.rbac.authorization.k8s.io/kubernetes-dashboard created
clusterrolebinding.rbac.authorization.k8s.io/kubernetes-dashboard created
deployment.apps/kubernetes-dashboard created
service/dashboard-metrics-scraper created
deployment.apps/kubernetes-metrics-scraper created

Health Check

The dashboard namespace is kubernetes-dashboard so we run the following.

root@kube-master [ ~/kube ]# kubectl get all --namespace=kubernetes-dashboard
NAME                                              READY   STATUS    RESTARTS   AGE
pod/kubernetes-dashboard-6f89577b77-pbngw         1/1     Running   0          27s
pod/kubernetes-metrics-scraper-79c9985bc6-kj6h5   1/1     Running   0          28s

NAME                                TYPE        CLUSTER-IP       EXTERNAL-IP   PORT(S)    AGE
service/dashboard-metrics-scraper   ClusterIP   10.254.189.11    <none>        8000/TCP   57s
service/kubernetes-dashboard        ClusterIP   10.254.127.216   <none>        443/TCP    61s

NAME                                         READY   UP-TO-DATE   AVAILABLE   AGE
deployment.apps/kubernetes-dashboard         1/1     1            1           57s
deployment.apps/kubernetes-metrics-scraper   1/1     1            1           57s

NAME                                                    DESIRED   CURRENT   READY   AGE
replicaset.apps/kubernetes-dashboard-6f89577b77         1         1         1       29s
replicaset.apps/kubernetes-metrics-scraper-79c9985bc6   1         1         1       29s

Connecting

On the main Dashboard page it indicates you can access via running “kubectl proxy” and access the URL. This is where it gets a little tricky. Not for us since we have flannel working, even on the master. Simply download the Kubernetes kubectl client for your OS and run it locally.

dwcjr@Davids-MacBook-Pro ~ % kubectl proxy
Starting to serve on 127.0.0.1:8001

Now access the indicated link in the article. Namespace changed as it changed in 2.0 – http://localhost:8001/api/v1/namespaces/kubernetes-dashboard/services/https:kubernetes-dashboard:/proxy/

Kubernetes Login Screen

Authenticating

Kubernetes Access Control page does a good job at describing this but at a high level

Create an dashboard-adminuser.yaml

apiVersion: v1
kind: ServiceAccount
metadata:
  name: admin-user
  namespace: kubernetes-dashboard

apiVersion: rbac.authorization.k8s.io/v1
kind: ClusterRoleBinding
metadata:
  name: admin-user
roleRef:
  apiGroup: rbac.authorization.k8s.io
  kind: ClusterRole
  name: cluster-admin
subjects:
- kind: ServiceAccount
  name: admin-user
  namespace: kubernetes-dashboard

kubectl apply -f dashboard-adminuser.yaml

Then use this cool snippet to find the token. If you’re doing this on the master, make sure to install awk

kubectl -n kubernetes-dashboard describe secret $(kubectl -n kubernetes-dashboard get secret | grep admin-user | awk '{print $1}')

At the bottom of the output should be a token section that you can plug into the token request.

From here you’ve made it. Things just got a whole lot easier if you’re a visual learner!

Kubernetes Dashboard View

Final Words

I may write a few more articles on this but that this point we have a very functional Kubernetes Cluster that can deploy apps given we throw enough resources at the VMs. Other topics that need to be covered are networking and the actual topology. I feel that one of the best ways to learn a platform or technology is to push through a guided install and then understand what the components are. This works for me but not everyone.

Kubernetes Flannel Configuration

Summary

With all the pre-requisites met, including SSL, flannel is fairly simple to install and configure. Where it goes wrong is if some of those pre-requisites have not been met or are misconfigured. You will star to find that out in this step.

We will be running flannel in a docker image, even on the master versus a standalone which is much easier to manage.

Why Do We Need Flannel Or An Overlay?

Without flannel, each node has the same IP range associated with docker. We could change this and manage it ourselves. We would then need to setup firewall rules and routing table entries to handle this. Then we also need to keep up with ip allocations.

Flannel does all of this for us. It does so with a minimal amount of effort.

Staging for Flannel

Config

We need to update /etc/kubernetes/controller-manager again and add

--allocate-node-cidrs=true --cluster-cidr=10.244.0.0/16

KUBE_CONTROLLER_MANAGER_ARGS="--root-ca-file=/secret/ca.crt  --service-account-private-key-file=/secret/server.key --allocate-node-cidrs=true --cluster-cidr=10.244.0.0/16"

And then restart kube-controller-manager

I always prefer to download my yaml files so I can review and replay as necessary. Per their documentation I am just going to curl the URL and then apply it

On each node we need to add the following the the /etc/kubernetes/kubelet config and then restart kubelet

KUBELET_ARGS="--network-plugin=cni"

Firewall

Since flannel is an overlay, it overlays over the existing network and we need to open UDP/8285 per their doc. Therefore we need to put this in iptables on each host

# This line for VXLAN
-A INPUT -p udp -m udp --dport 8472 -j ACCEPT

# This line for UDP
-A INPUT -p udp -m udp --dport 8285 -j ACCEPT

Fire it up!

Now we are ready to apply and let it all spin up!

root@kube-master [ ~/kube ]# curl -O https://raw.githubusercontent.com/coreos/flannel/master/Documentation/kube-flannel.yml

root@kube-master [ ~/kube ]# kubectl apply -f kube-flannel.yml
podsecuritypolicy.policy/psp.flannel.unprivileged created
clusterrole.rbac.authorization.k8s.io/flannel created
clusterrolebinding.rbac.authorization.k8s.io/flannel created
serviceaccount/flannel created
configmap/kube-flannel-cfg created
daemonset.apps/kube-flannel-ds-amd64 created
daemonset.apps/kube-flannel-ds-arm64 created
daemonset.apps/kube-flannel-ds-arm created
daemonset.apps/kube-flannel-ds-ppc64le created
daemonset.apps/kube-flannel-ds-s390x created

If all is well at this point, it should be chewing through CPU and disk and in a minute or two the pods are deployed!

root@kube-master [ ~/kube ]# kubectl get pods --namespace=kube-system
NAME                          READY   STATUS    RESTARTS   AGE
kube-flannel-ds-amd64-7dqd4   1/1     Running   17         138m
kube-flannel-ds-amd64-hs6c7   1/1     Running   1          138m
kube-flannel-ds-amd64-txz9g   1/1     Running   18         139m

On each node you should see a “flannel” interface now too.

root@kube-master [ ~/kube ]# ifconfig -a | grep flannel
flannel.1 Link encap:Ethernet  HWaddr 1a:f8:1a:65:2f:75

Troubleshooting Flannel

From the “RESTARTS” section you can see some of them had some issues. What kind of blog would this be if I didn’t walk you through some troubleshooting steps?

I knew that the successful one was the master so it was likely a connectivity issue. Testing “curl -v https://10.254.0.1” passed on the master but failed on the nodes. By pass, I mean it made a connection but complained about the TLS certificate (which is fine). The nodes, however, indicated some sort of connectivity issue or firewall issue. So I tried the back end service member https://192.168.116.174:6443 and same symptoms. I would have expected Kubernetes to open up this port but it didn’t so I added it to iptables and updated my own documentation.

Some other good commands are “kubectl logs <resource>” such as

root@kube-master [ ~/kube ]# kubectl logs pod/kube-flannel-ds-amd64-txz9g --namespace=kube-system
I1031 18:47:14.419895       1 main.go:514] Determining IP address of default interface
I1031 18:47:14.420829       1 main.go:527] Using interface with name eth0 and address 192.168.116.175
I1031 18:47:14.421008       1 main.go:544] Defaulting external address to interface address (192.168.116.175)
I1031 18:47:14.612398       1 kube.go:126] Waiting 10m0s for node controller to sync
I1031 18:47:14.612648       1 kube.go:309] Starting kube subnet manager
....

You will notice the “namespace” flag. Kubernetes can segment resources into namespaces. If you’re unsure of which namespace something exists in, you can use “–all-namespaces”

Final Words

Now we have a robust network topology where pods can have unique IP ranges and communicate to pods on other nodes.

Next we will be talking about Kubernetes Dashboard and how to load it. The CLI is not for everyone and the dashboard helps put things into perspective.

Next – Kubernetes Dashboard
Next – Spinning Up Rancher With Kubernetes

Kubernetes SSL Configuration

Summary

Picking up where we left off in the Initializing Kubernetes article, we will now be setting up certificates! This will be closely following the Kubernetes “Certificates” article. Specifically using OpenSSL as easyrsa has some dependency issues with Photon.

OpenSSL

Generating Files

We’ll be running the following commands and I keep them in /root/kube/certs. They won’t remain there but its a good staging area that needs to be cleaned up or secured so we don’t have keys laying around.

openssl genrsa -out ca.key 2048
openssl req -x509 -new -nodes -key ca.key -subj "/CN=$192.168.116.174" -days 10000 -out ca.crt
openssl genrsa -out server.key 2048

We then need to generate a csr.conf

[ req ]
default_bits = 2048
prompt = no
default_md = sha256
req_extensions = req_ext
distinguished_name = dn

[ dn ]
C = <country>
ST = <state>
L = <city>
O = <organization>
OU = <organization unit>
CN = <MASTER_IP>

[ req_ext ]
subjectAltName = @alt_names

[ alt_names ]
DNS.1 = kubernetes
DNS.2 = kubernetes.default
DNS.3 = kubernetes.default.svc
DNS.4 = kubernetes.default.svc.cluster
DNS.5 = kubernetes.default.svc.cluster.local
IP.1 = <MASTER_IP>
IP.2 = <MASTER_CLUSTER_IP>

[ v3_ext ]
authorityKeyIdentifier=keyid,issuer:always
basicConstraints=CA:FALSE
keyUsage=keyEncipherment,dataEncipherment
extendedKeyUsage=serverAuth,clientAuth
subjectAltName=@alt_names

In my environment the MASTER_IP is 192.168.116.174 and the cluster IP is usually a default but we can get it by running kubectl

root@kube-master [ ~/kube ]# kubectl get services kubernetes
NAME         TYPE        CLUSTER-IP   EXTERNAL-IP   PORT(S)   AGE
kubernetes   ClusterIP   10.254.0.1   <none>        443/TCP   60m
[ req ]
default_bits = 2048
prompt = no
default_md = sha256
req_extensions = req_ext
distinguished_name = dn

[ dn ]
C = US
ST = Texas
L = Katy
O = Woohoo Services
OU = IT
CN = 192.168.116.174

[ req_ext ]
subjectAltName = @alt_names

[ alt_names ]
DNS.1 = kubernetes
DNS.2 = kubernetes.default
DNS.3 = kubernetes.default.svc
DNS.4 = kubernetes.default.svc.cluster
DNS.5 = kubernetes.default.svc.cluster.local
IP.1 = 192.168.116.174
IP.2 = 10.254.0.1

[ v3_ext ]
authorityKeyIdentifier=keyid,issuer:always
basicConstraints=CA:FALSE
keyUsage=keyEncipherment,dataEncipherment
extendedKeyUsage=serverAuth,clientAuth
subjectAltName=@alt_names

We then run

openssl req -new -key server.key -out server.csr -config csr.conf

openssl x509 -req -in server.csr -CA ca.crt -CAkey ca.key \
-CAcreateserial -out server.crt -days 10000 \
-extensions v3_ext -extfile csr.conf

# For verification only
openssl x509  -noout -text -in ./server.crt

Placing Files

I create a /secrets and moved the files in as follows

mkdir /secrets
chmod 700 /secrets
chown kube:kube /secrets

cp ca.crt /secrets/
cp server.crt /secrets/
cp server.key /secrets/
chmod 700 /secrets/*
chown kube:kube /secrets/*

Configure API Server

On the master, edit /etc/kubernetes/apiserver and add the following parameters

--client-ca-file=/secrets/ca.crt
--tls-cert-file=/secrets/server.crt
--tls-private-key-file=/secrets/server.key

KUBE_API_ARGS="--client-ca-file=/secrets/ca.crt --tls-cert-file=/secrets/server.crt --tls-private-key-file=/secrets/server.key"

Restart kube-apiserver. We also need to edit /etc/kubernetes/controller-manager

KUBE_CONTROLLER_MANAGER_ARGS="--root-ca-file=/secrets/ca.crt  --service-account-private-key-file=/secrets/server.key"

Trusting the CA

We need to copy the ca.crt to /etc/ssl/certs/kube-ca.pem on each node and then install the package “openssl-c_rehash” as I found here. Photon is very minimalistic so you will find you keep having to add packages for things you take for granted.

tdnf install openssl-c_rehash

c_rehash
Doing //etc/ssl/certs
link 3513523f.pem => 3513523f.0
link 76faf6c0.pem => 76faf6c0.0
link 68dd7389.pem => 68dd7389.0
link e2799e36.pem => e2799e36.0
.....
link kube-ca.pem => 8e7edafa.0

Final Words

At this point, you have a Kubernetes cluster setup with some basic security. Not very exciting, at least in terms of seeing results but the next article should be meaningful to show how to setup flannel.

Next – Flannel Configuration