Summary
In this article we tackle VM orchestration. We I touched on in other articles, the desire is to dynamically spin up VMs as necessary. Some of the constructions in Google Cloud that are used are instance templates, instance groups, load balancers, health checks, salt (both state and reactor).
First Things First
In order to dynamically spin up VMs we need an instance group. For an instance group to work dynamically we need an instance template.
Instance Template
For this instance template, I will name it web-test. The name for this is important but we’ll touch on that later on.

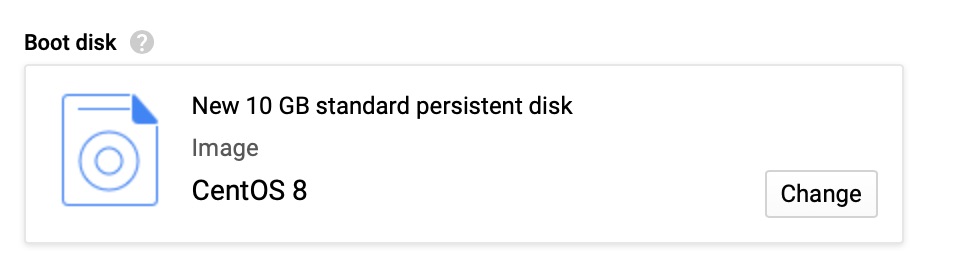
For this demonstration we used CentOS 8. It can be any OS but our Salt state is tuned for CentOS.
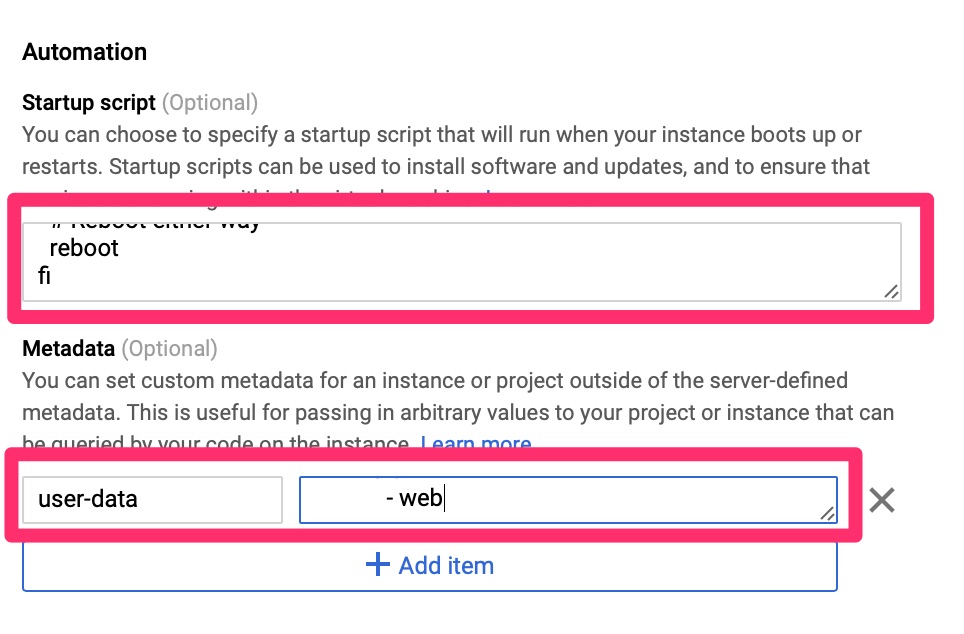
As we touched on in the Cloud-init on Google Compute Engine article, we need to automate the provisioning and configuration on this. Since Google’s CentOS image does not come with this we use the startup script to load it. Once loaded and booted, cloud-init configures the local machine as a salt-minion and points it to the master.
Startup Script below
#!/bin/bash

if ! type cloud-init > /dev/null 2>&1 ; then
  # Log startup of script
  echo "Ran - `date`" >> /root/startup
  sleep 30
  yum install -y cloud-init

  if [ $? == 0 ]; then
    echo "Ran - yum success - `date`" >> /root/startup
    systemctl enable cloud-init
    # Sometimes GCE metadata URI is inaccessible after the boot so start this up and give it a minute
    systemctl start cloud-init
    sleep 10
  else
    echo "Ran - yum fail - `date`" >> /root/startup
  fi

  # Reboot either way
  reboot
fi
cloud-init.yaml below
#cloud-config

yum_repos:
    salt-py3-latest:
        baseurl: https://repo.saltstack.com/py3/redhat/$releasever/$basearch/latest
        name: SaltStack Latest Release Channel Python 3 for RHEL/Centos $releasever
        enabled: true
        gpgcheck: true
        gpgkey: https://repo.saltstack.com/py3/redhat/$releasever/$basearch/latest/SALTSTACK-GPG-KEY.pub

salt_minion:
    pkg_name: 'salt-minion'
    service_name: 'salt-minion'
    config_dir: '/etc/salt'
    conf:
        master: saltmaster263.us-central1-c.c.woohoo-blog-2414.internal
    grains:
        role:
            - web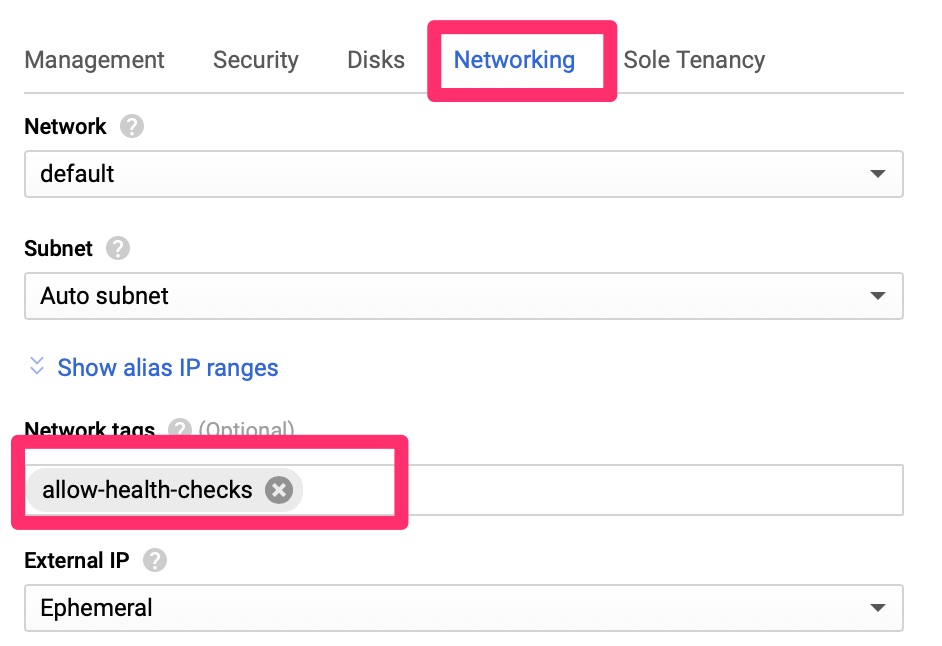
The network tag itself does not do anything at this point. Later on we will tie this into a firewall ACL to allow the Google health checks to pass.
Now we have an instance template. From our Intro to Salt Stack article we should have a salt server.
SaltStack Server
We have a state file here to provision the state but from our exposure we need salt to automagically do a few things.
Salt is a fairly complex setup so I have provided some of the files at the very bottom. I did borrow many ideas from this page of SaltStack’s documentation – https://docs.saltstack.com/en/latest/topics/tutorials/states_pt4.html
The first thing is to accept new minions as this is usually manual. We then need it to apply a state. Please keep in mind there are security implications of auto accepting. These scripts do not take that into consideration as they are just a baseline to get this working.
In order to have these automatically work, we need to use Salt reactor which listens to events and acts on them. Our reactor file looks like this. We could add some validation, particularly on the accept such as validating the minion name has web in it to push the wordpress state.
{# test server is sending new key -- accept this key #}
{% if 'act' in data and data['act'] == 'pend' %}
minion_add:
  wheel.key.accept:
  - match: {{ data['id'] }}
{% endif %}
{% if data['act'] == 'accept' %}
initial_load:
  local.state.sls:
    - tgt: {{ data['id'] }}
    - arg:
      - wordpress
{% endif %}
This is fairly simple. When a minion authenticates for the first time, acknowledge it and then apply the wordpress state we worked on in our articicle on Salt State. Since we may have multiple and rotating servers that spin up and down we will use Google’s Load Balancer to point Cloudflare to.
Cloudflare does offer load balancing but for the integration we want, its easier to use Google. The load balancer does require an instance group so we need to set that up first.
Instance Groups
Instance groups are one of the constructions you can point a load balancer towards. Google has two types of instance groups. Managed, which it will auto scale based on health checks. There is also managed which you have to manually add VMs to. We will choose managed
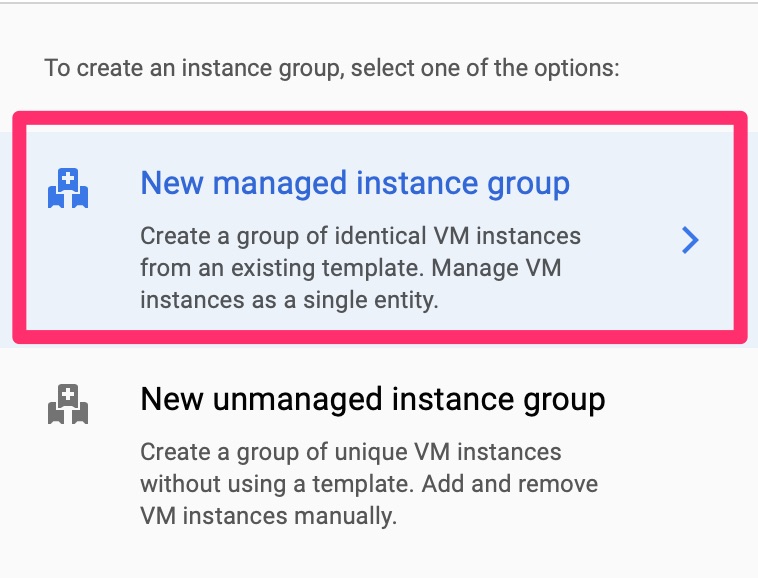
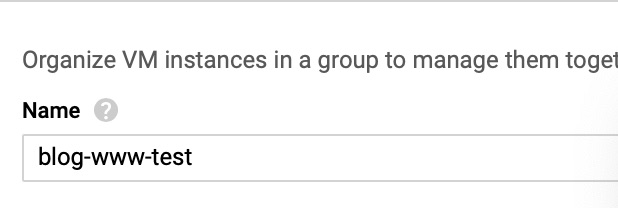
This name is not too important so it can be any one you like.
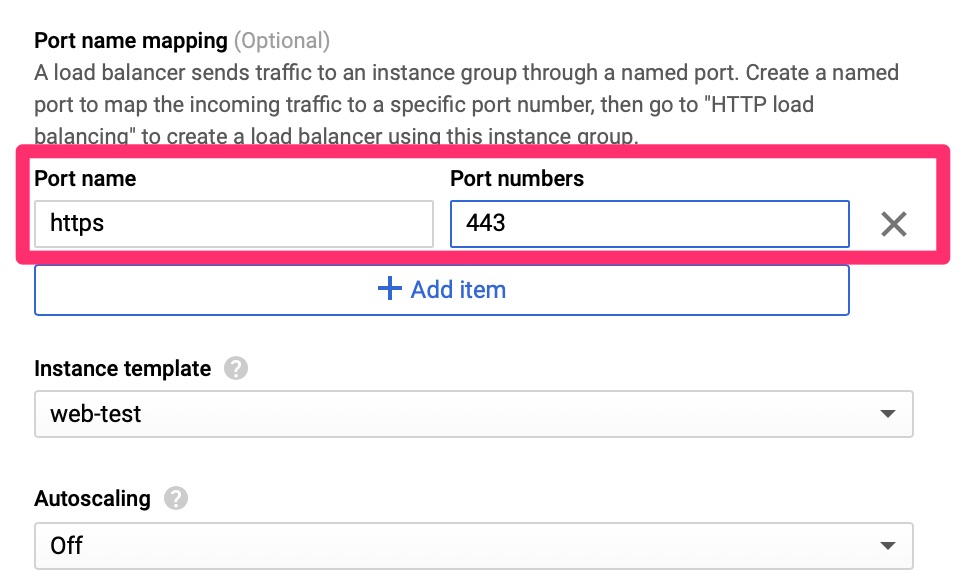
Here we set the port name and number, an instance template. For this lab we disabled autoscaling but in the real world this is why you want to set all of this up.
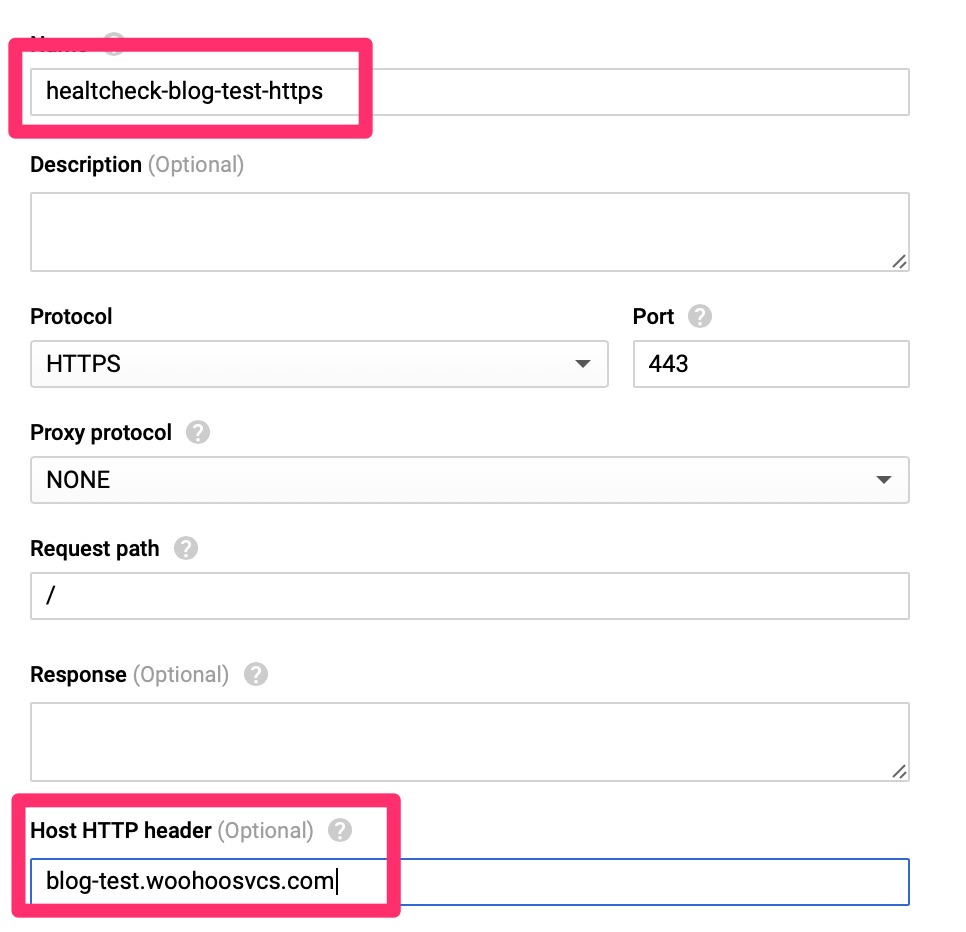
The HealthCheck expects to receive an HTTP 200 message for all clear. It is much better than a TCP check as it can validate the web server is actually responding with expected content. Since WordPress sends a 301 to redirect, we do have to set the Host HTTP Header here, otherwise the check will fail. Other load balancers only fail on 400-599 but Google does expect only a HTTP 200 per their document – https://cloud.google.com/load-balancing/docs/health-check-concepts

And here you can see it is provisioning! While it does that, let’s move over to the load balancer.
Firewall Rules
The health checks for the load balancer come from a set range of Google IPs that we need to allow. We can allow these subnets via network tags. Per Google’s Healthcheck document, the HTTP checks come from two ranges.
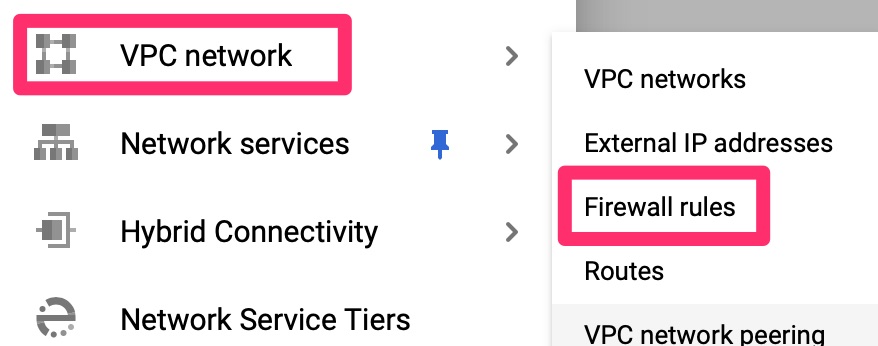
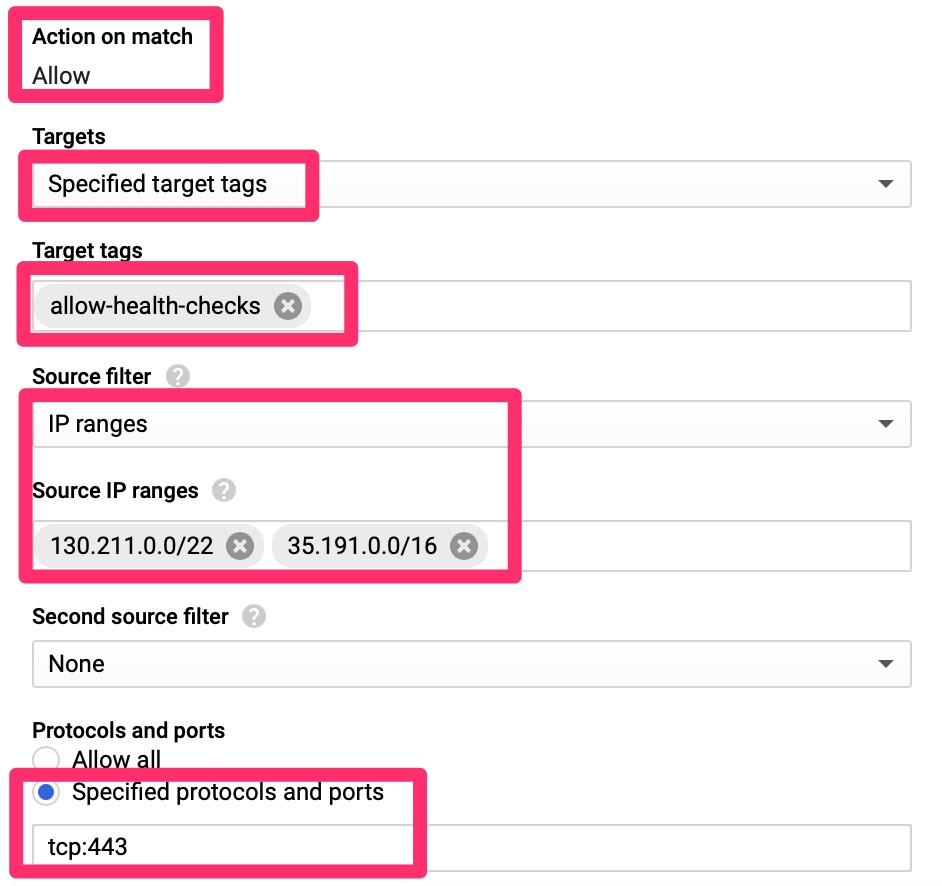
Here we only allow the health checks from the Google identified IP ranges to machines that are tagged with “allow-health-checks” to port 443.
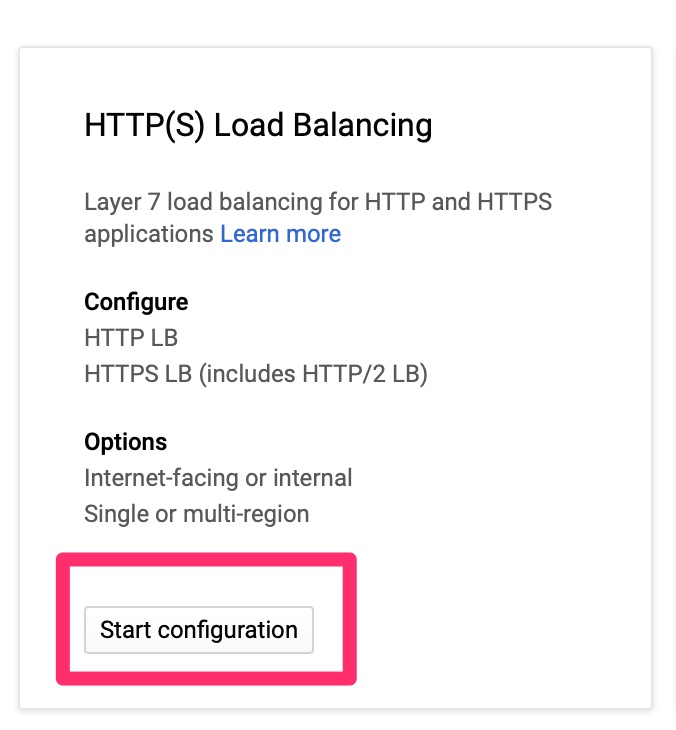
Google Load Balancer
Initial
This is a crash course into load balancers if you have never set them up before. It is expected you have some understanding of front end, back end and health checks. In the VPC section we need to allow these
Back End Configuration
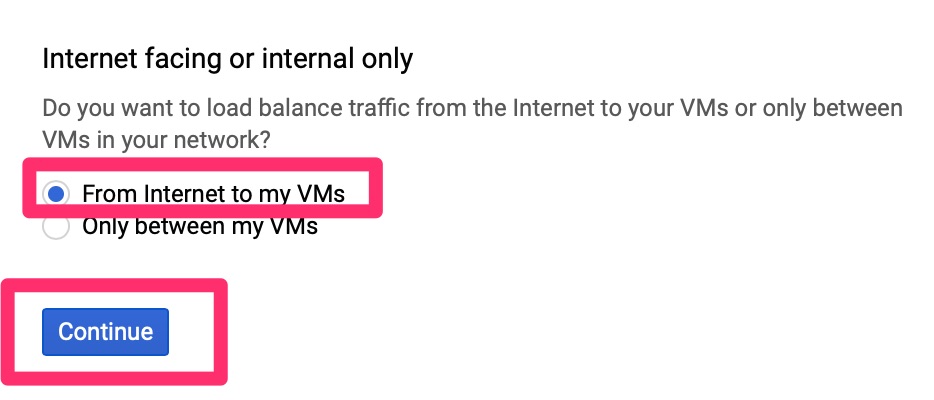
Google’s load balancers can be used for internal only or external to internal. We want to load balance external connections.
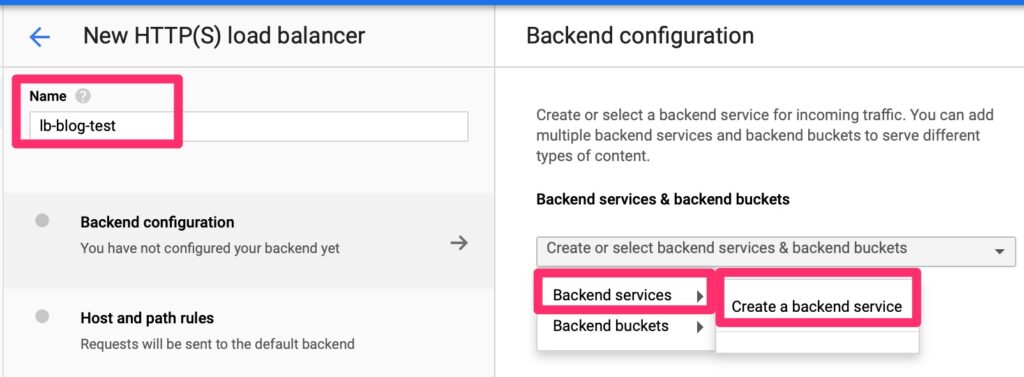
We will need to create a back end endpoint.
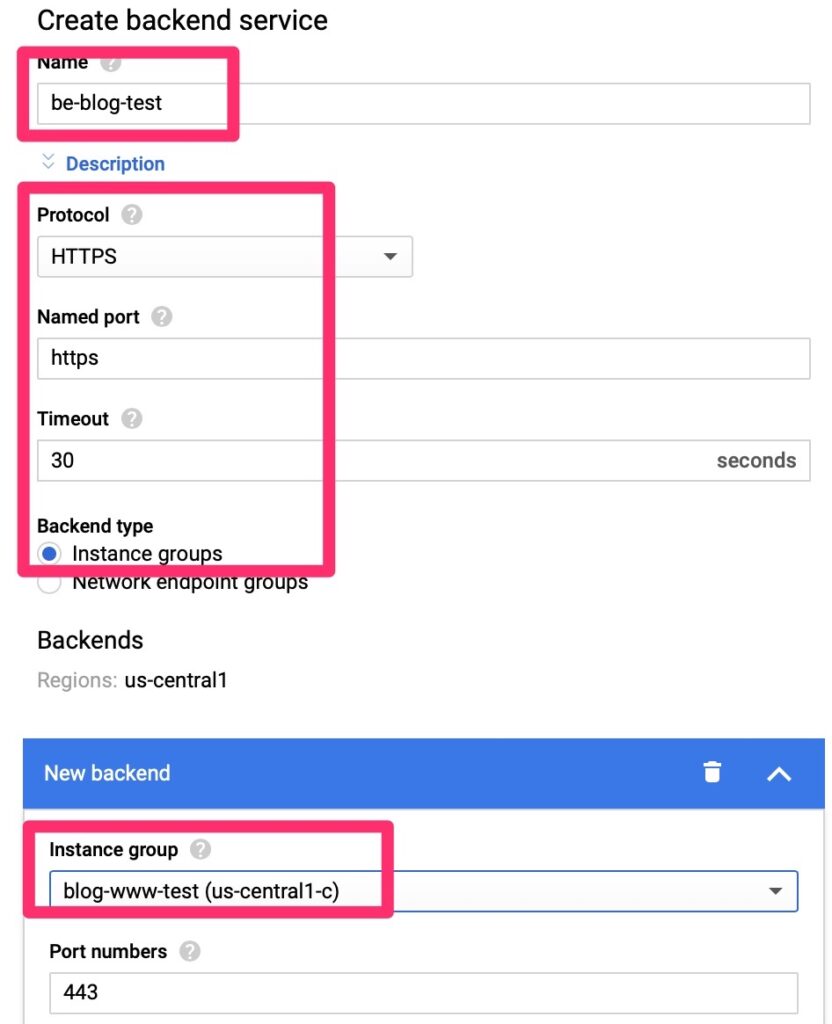
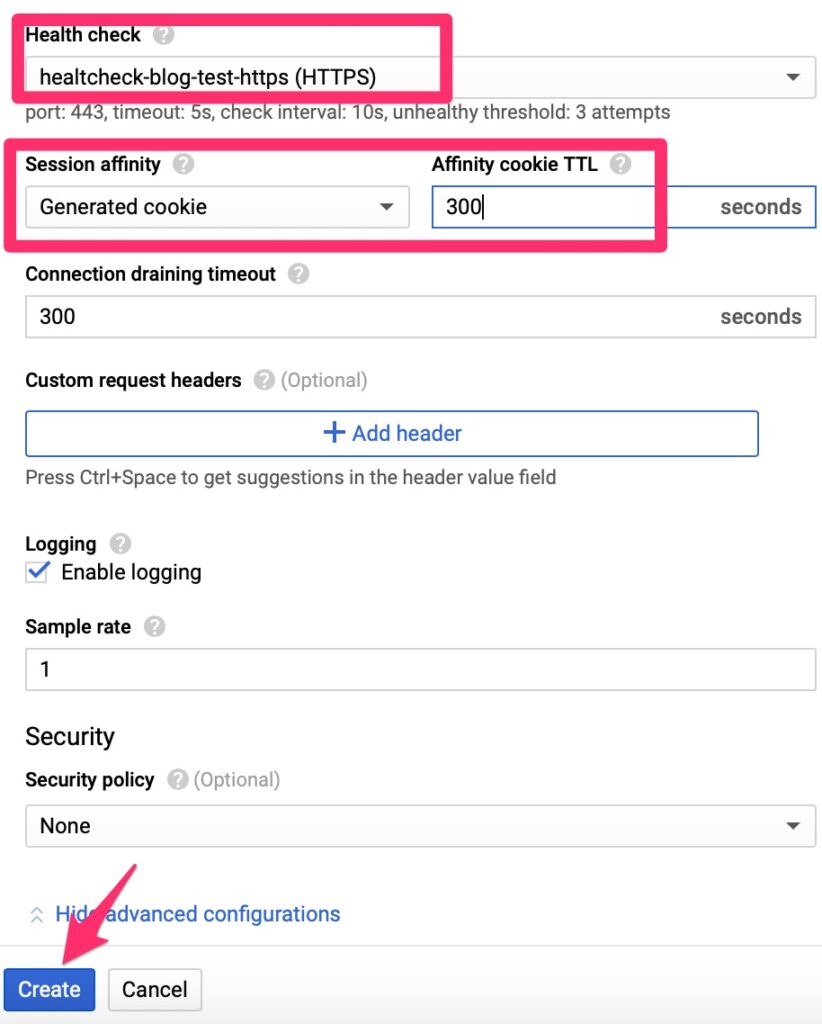
Luckily this is simple. We point it at a few objects we already created and set session affinity so that traffic is persistent to a single web server. We do not want it hopping between servers as it may confuse the web services.
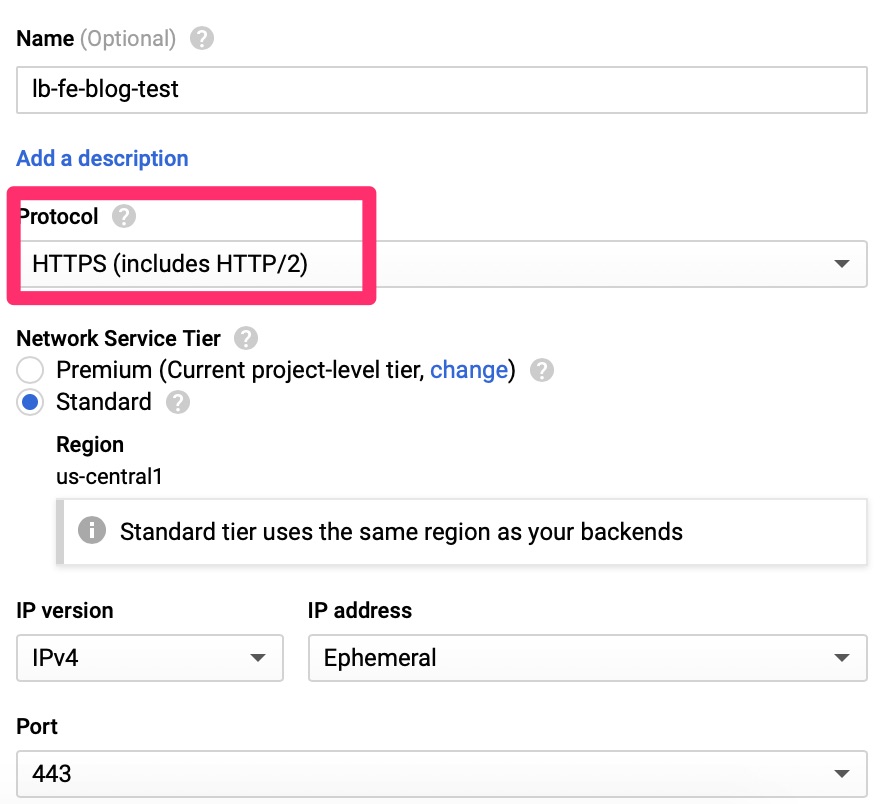
Front End Configuration
Health Check Validation
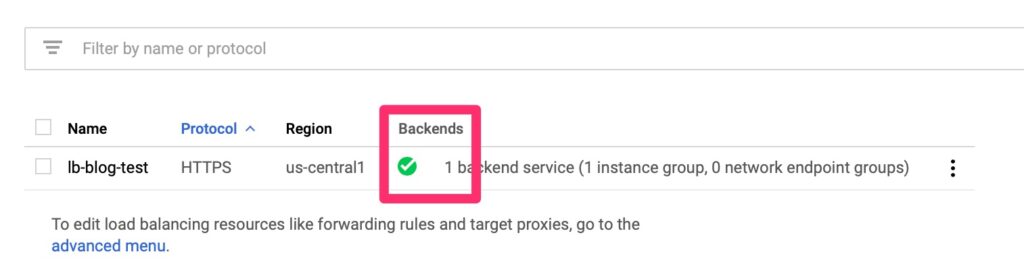
Give the load balancer provisioning a few minutes to spin up. It should then show up healthy if all is well. This never comes up the first time. Not even in a lab!
Troubleshooting
The important part is to walk through the process from beginning to end when something does not work. Here’s a quick run through.
- On provisioning, is the instance group provisioning the VM?
- What is the status of cloud-init?
- Is salt-minion installing on the VM and starting?
- Does the salt-master see the minion?
- Reapply the state and check for errors
- Does the load balancer see health?
Final Words
If it does come up healthy, the last step is to point your DNS at the load balancer public IP and be on your way!
Since Salt is such a complex beast, I have provided most of the framework and configs here – Some of the more sensitive files are truncated but left so that you know they exist. The standard disclaimer applies in that I cannot guarantee the outcome of these files on your system or that they are best practices from a security standpoint.