Summary
It is 2023 and a lot has changed since my prior Photon OS and Kubernetes posts. Some things have become much easier but also things have changed such as the migration from docker/dockershim to containerd.
Installation
Installation is as simple as ever. It requires having the ISO and installing. It will require that you navigate to https://github.com/vmware/photon/wiki/Downloading-Photon-OS and download 5.0 (full or minimal).
For the VM specifications, you will need at least 2 cores to run the control plane. I set my lab up with 2 cores, 4GB RAM and 30GB HDD.
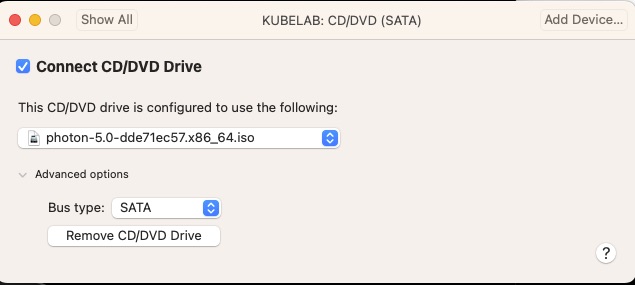
My local fusion defaults to an IDE for the CD/DVD and Photon OS 5.0 does not do well with that and recommends changing it to SATA.
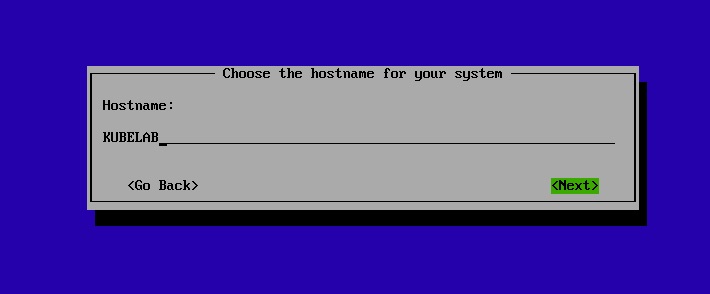
After boot into the ISO, just a few simple questions and we’re off! For my lab I’m naming it KUBELAB
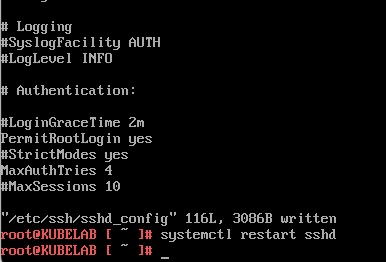
Once booted, I prefer to access via SSH and since only a root user has been provisioned I will allow root logins via ssh by editing /etc/ssh/sshd_config
That’s it, we’re installed!
Setting up Dependencies
Instead of using the Photon OS Kubernetes packages, we’ll be using the Google ones. They provide better granularity which is required for upgrades. Instructions for adding them are https://kubernetes.io/docs/setup/production-environment/tools/kubeadm/install-kubeadm/
In particular we want to do the following
cat <<EOF | sudo tee /etc/yum.repos.d/kubernetes.repo
[kubernetes]
name=Kubernetes
baseurl=https://packages.cloud.google.com/yum/repos/kubernetes-el7-\$basearch
enabled=1
gpgcheck=1
gpgkey=https://packages.cloud.google.com/yum/doc/rpm-package-key.gpg
exclude=kubelet kubeadm kubectl
EOF
Since Photon OS uses tdnf, we’ll want to install via
# Install 1.25.11-0 of Kubernetes!
tdnf install kubeadm-1.25.11-0 kubectl-1.25.11-0 kubelet-1.25.11-0 cri-tools-1.25.0-0
For this, we’re choosing 1.25.11-0 as I’ve exhaustively tested it for the series I am doing. Once installed, we want to disable the /etc/yum.repos.d/kubernetes.repo by setting “enabled=0” so that OS updates do not push Kubernetes update as we want to control that.
After doing that let’s update the OS packages. But first let’s remove docker we not use containerd
# We are using containerd now
tdnf remove docker*

# OS Updates
tdnf --refresh update
Before we reboot there are a few tried and true settings we’ll want to update.
In /etc/sysctl.d/90-kubernetes.conf

# These are required for it to work properly
net.bridge.bridge-nf-call-iptables = 1
net.bridge.bridge-nf-call-ip6tables = 1
net.ipv4.ip_forward = 1

# This helps an issue later on when we get into running promtail
fs.inotify.max_user_instances = 256


In /etc/modules-load.d/20-kubernetes.conf
# Required to allow the basic networking to work
br_netfilter

In /etc/security/limits.conf
# Bump up the default of 1024 max open files per process to 10000
*		hard	nofile		10000

In /etc/containerd/config.toml
version = 2
[plugins]
  [plugins."io.containerd.grpc.v1.cri"]
   [plugins."io.containerd.grpc.v1.cri".containerd]
      [plugins."io.containerd.grpc.v1.cri".containerd.runtimes]
        [plugins."io.containerd.grpc.v1.cri".containerd.runtimes.runc]
          runtime_type = "io.containerd.runc.v2"
          [plugins."io.containerd.grpc.v1.cri".containerd.runtimes.runc.options]
            SystemdCgroup = true


In /etc/crictl.yaml

runtime-endpoint: "unix:///run/containerd/containerd.sock"
image-endpoint: "unix:///run/containerd/containerd.sock"
timeout: 0
debug: false
pull-image-on-create: false
disable-pull-on-run: false

In /etc/hosts
# Change the localhost binding to the IP of the VM
# Without this kubectl get node - won't show ready
#127.0.0.1   KUBELAB
192.168.83.170  KUBELAB
The config.tomly should look like this.
Now we reboot!
Initialize The Cluster
For this we will run the following with –pod-network-cidr. This is the default for flannel which we’ll use for ease.
# Allow kubelet to start when kubeadm init allows it
systemctl enable kubelet.service

# Initialize - this may take a while as the pods are pulled down
kubeadm init --pod-network-cidr=10.244.0.0/16
This will take 5-10 minutes, maybe longer depending on your internet connection. When you come back with any luck you’ll see success!!!
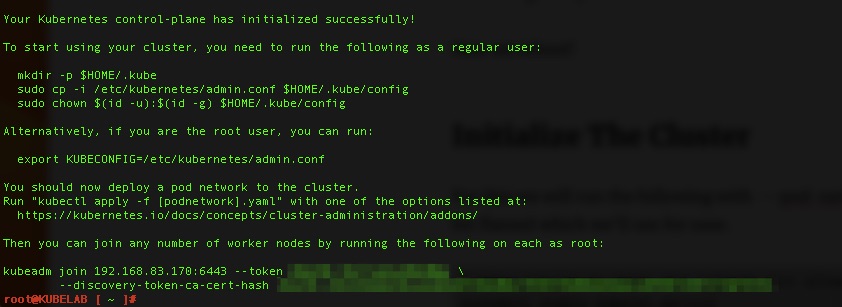
follow the steps listed.
mkdir -p $HOME/.kube
cp -i /etc/kubernetes/admin.conf $HOME/.kube/config
chown $(id -u):$(id -g) $HOME/.kube/config

# Check to see if pods are up!
root@KUBELAB [ ~ ]# kubectl get pods -A
NAMESPACE     NAME                              READY   STATUS    RESTARTS   AGE
kube-system   coredns-565d847f94-6gmrp          0/1     Pending   0          2m31s
kube-system   coredns-565d847f94-wrvqk          0/1     Pending   0          2m31s
kube-system   etcd-kubelab                      1/1     Running   0          2m46s
kube-system   kube-apiserver-kubelab            1/1     Running   0          2m44s
kube-system   kube-controller-manager-kubelab   1/1     Running   0          2m46s
kube-system   kube-proxy-g9kpj                  1/1     Running   0          2m31s
kube-system   kube-scheduler-kubelab            1/1     Running   0          2m44s
Almost there
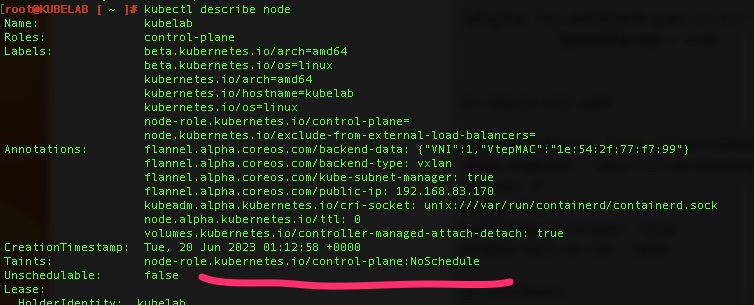
The cluster(single node) is up but we still need networking which we’ll use Flannel and to remove a taint to allow scheduling on the control plane since this will be a single node lab with control plane and worker nodes on the same VM.
# Reference https://github.com/flannel-io/flannel

# Apply the flannel network overlay
kubectl apply -f https://github.com/flannel-io/flannel/releases/latest/download/kube-flannel.yml

# Remove the taint - the minus removes it
kubectl taint nodes kubelab node-role.kubernetes.io/control-plane:NoSchedule-
Validations!
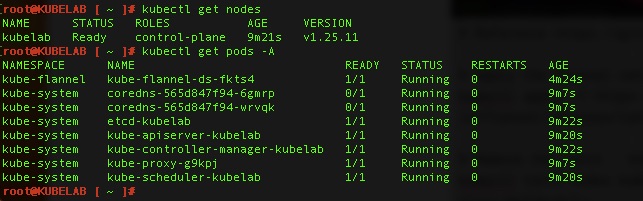
By running kubectl get pods -A and kubectl get nodes – we can see pods are running and the node is “Ready”
One thought on “Photon OS 5.0 & Kubernetes 1.25”
Comments are closed.