Summary
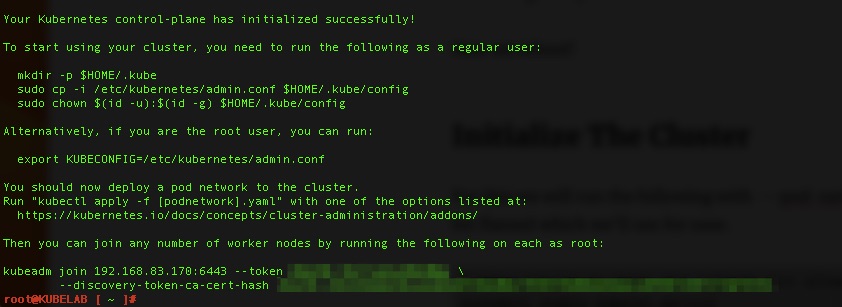
The purpose of this article is to walk through bootstrapping a CA for Kubernetes clusters for use in the ingresses and other possible needs like a private docker repository. For this we will use https://cert-manager.io. We will assume you have an operational K8 cluster/node but if not check out https://blog.woohoosvcs.com/2023/06/photon-os-5-0-kubernetes-1-25/ on how to do that.
Use Case
A really good use case for this is when you want to use self-signed certificates in your lab but want the browser to trust it. For certificates to work, they require FQDNs. One could certainly have host file entries for every endpoint they need but I recently came across a more elegant solution “localdev.me”. This was referenced in a few places but namely https://kubernetes.github.io/ingress-nginx/deploy/
The beauty of localdev.me is that any subdomain resolves to 127.0.0.1 so you can easily run
kubectl port-forward svc/ingress-nginx-controller -n ingress-nginx 443:443To forward all of your ingresses to localhost. Its a neat trick and in today’s world we want to test TLS encryption using HTTPS.
Requirements
For this, we simply need to install cert-manager. There are two main ways. kubectl apply or using the Helm Chart. If you’re not familiar with Helm, please go down that rabbit hole. For this we’ll assume you are just running kubectl apply.
Installation
kubectl apply -f https://github.com/cert-manager/cert-manager/releases/download/v1.12.0/cert-manager.yamlWith any luck you will have some cert-manager related pods running
% kubectl get pods -n cert-manager
NAME                                      READY   STATUS    RESTARTS   AGE
cert-manager-559b5d5b7d-tq7rt             1/1     Running   0          29s
cert-manager-cainjector-f5c6565d4-vv652   1/1     Running   0          29s
cert-manager-webhook-5f44bc85f4-qkg7s     1/1     Running   0          29s
What Next?
Cert-Manager is a fairly extensible framework. It can connect to ACME compatible authorities to request and process certificate creation and renewals but for this we will be using two other configurations for it. We will be using the “CA” ClusterIssuer. In order to bootstrap a CA though we also have to use the “SelfSigned” Issuer.
Show Me the YAML
At the beginning is a Self signed issuer. What this means in our case is that the certificate’s common name matches the issuer name. You will find this in any public certificate authority root as well. There are two types of “issuers” in cert-manager. An “Issuer” which is namespaced and can only issue for that namespace and a “ClusterIssuer” which can issue for the cluster. For labs I like to use ClusterIssuers so do not need to have multiple issuers.
Certificates are namespaced though. My preference is to have a wildcard certificate in each namespace but you can also have the ingress request certificates.
No – Really Show Me the YAML!
apiVersion: cert-manager.io/v1
kind: ClusterIssuer
metadata:
  name: selfsigned-issuer
spec:
  selfSigned: {}
Here we have a simple self-signed issuer. An Issuer is just a construct to issuer certificates. We still need to create the CA Certificate.
apiVersion: cert-manager.io/v1
kind: Certificate
metadata:
  name: my-selfsigned-ca
  namespace: cert-manager
spec:
  isCA: true
  commonName: my-selfsigned-ca
  duration: 43800h
  secretName: root-secret
  privateKey:
    algorithm: ECDSA
    size: 256
  issuerRef:
    name: selfsigned-issuer
    kind: ClusterIssuer
    group: cert-manager.io
Here we are requesting a root certificate that will expire in 5 years. We can’t swap these out too regularly because its a pain getting our OS and other tools to trust them. In the issuerRef we see the self-signed-issuer referenced with many other attributes we’ll use later.
Then we need to create a cluster issuer for the certificates we want to issue. We tell it to use the ca root-secret for the chain.
apiVersion: cert-manager.io/v1
kind: ClusterIssuer
metadata:
  name: my-ca-cluster-issuer
  namespace: cert-manager
spec:
  ca:
    secretName: root-secret
Next we will issue a certificate in a namespace that will chain off the self-signed root. It is namespaced to the sandbox namespace. They will expire after 90 days and renew 15 days before expiration.
Make sure to create the sandbox namespace first if you want to use this or change it to the namespace you want.
apiVersion: cert-manager.io/v1
kind: Certificate
metadata:
  name: localdev-me
  namespace: sandbox
spec:
  # Secret names are always required.
  secretName: localdev-me-tls

  # Secret template is optional. If set, these annotations
  # and labels will be copied to the secret named example-com-tls.

  # Note: Labels and annotations from the template are only synced to the Secret at the time when the certificate
  # is created or renewed. Currently labels and annotations can only be added, but not removed. Removing any
  # labels or annotations from the template or removing the template itself will have no effect.
  # See https://github.com/cert-manager/cert-manager/issues/4292.
  secretTemplate:
    annotations:
      my-secret-annotation-1: "foo"
      my-secret-annotation-2: "bar"
    labels:
      my-secret-label: foo

  duration: 2160h # 90d
  renewBefore: 360h # 15d
  subject:
    organizations:
      - Woohoo Services
  # The use of the common name field has been deprecated since 2000 and is
  # discouraged from being used.
  commonName: localdev.me
  isCA: false
  privateKey:
    algorithm: RSA
    encoding: PKCS1
    size: 2048
  usages:
    - server auth
    - client auth
  # At least one of a DNS Name, URI, or IP address is required.
  dnsNames:
    - localdev.me
    - "*.localdev.me"
  # Issuer references are always required.
  issuerRef:
    name: my-ca-cluster-issuer
    # We can reference ClusterIssuers by changing the kind here.
    # The default value is Issuer (i.e. a locally namespaced Issuer)
    kind: ClusterIssuer
    # This is optional since cert-manager will default to this value however
    # if you are using an external issuer, change this to that issuer group.
    group: cert-manager.io
We now have a wildcard certificate for use in the sandbox namespace
% kubectl get secret/localdev-me-tls -n sandbox -o yaml
apiVersion: v1
data:
  ca.crt: XXXXX
  tls.crt: XXXXX
  tls.key: XXXXX
kind: Secret
metadata:
  annotations:
    cert-manager.io/alt-names: localdev.me,*.localdev.me
    cert-manager.io/certificate-name: localdev-me
    cert-manager.io/common-name: localdev.me
    cert-manager.io/ip-sans: ""
    cert-manager.io/issuer-group: cert-manager.io
    cert-manager.io/issuer-kind: ClusterIssuer
    cert-manager.io/issuer-name: my-ca-cluster-issuer
    cert-manager.io/subject-organizations: Woohoo Services
    cert-manager.io/uri-sans: ""
    my-secret-annotation-1: foo
    my-secret-annotation-2: bar
  creationTimestamp: "2023-06-25T19:20:05Z"
  labels:
    controller.cert-manager.io/fao: "true"
    my-secret-label: foo
  name: localdev-me-tls
  namespace: sandbox
  resourceVersion: "3711"
  uid: 3fcca4e2-2918-486c-b191-e10bd585259e
type: kubernetes.io/tls
Where is the Trust?
You may be wondering, great but how do I get my browser to trust this? You’re right, this is essentially an untrusted certificate chain. We need to base64decode the ca.crt section and then import it into a few places. The most important is your OS/browser so that it trusts the root.
On MacOS you’ll use keychain to import and set the trust on it to allow it much like this article – https://tosbourn.com/getting-os-x-to-trust-self-signed-ssl-certificates/
On Windows it will look closer to https://techcommunity.microsoft.com/t5/windows-server-essentials-and/installing-a-self-signed-certificate-as-a-trusted-root-ca-in/ba-p/396105
There may be cases where you need your Kubernetes cluster to trust it as well. That will depend on your distribution but for Photon running a stock K8 distribution its fairly trivial.
You’ll simply put a copy in /etc/ssl/certs/ using a unique name. You will need “openssl-c_rehash” as mentioned in https://github.com/vmware/photon/issues/592 to be able to get the OS to trust it.
You will also want to add the PEM to /etc/docker/certs.d/ so that docker itself (or containerd) trusts it. You will need to restart docker/containerd to get it to accept the cert though. The use case for this is that if you want to mount the certificate in the private repository doing something like this you can. In this case the kubelet on the kubernetes node will call docker/containerd and that will need to trust the certificate.
     volumes:
      - name: localdev-me-tls
        secret:
          secretName: localdev-me-tls
      ...
      containers:
        - image: registry:2
          name: private-repository-k8s
          imagePullPolicy: IfNotPresent
          env:
          - name: REGISTRY_HTTP_TLS_CERTIFICATE
            value: "/certs/tls.crt"
          - name: REGISTRY_HTTP_TLS_KEY
            value: "/certs/tls.key"
          ...
          volumeMounts:
          - name: localdev-me-tls
            mountPath: /certs
Final Words
There you have it. A cluster wide CA that you can have your K8 nodes and local machine trust for TLS encryption. Once setup in this manner it makes it easy and portable to using something like letsencrypt when going to production because most of the framework and configuration is there and has been tested.