Summary
It seem every week we see a new article of some sort of IT security related incident. While many of these larger companies tend to have security tools to help combat them, many smaller companies do not know where to start. An eye opening experience would be to run an internal vulnerability scan on your corporate network to see what types of vulnerabilities you have.
These scans results may then drive you to more promptly patch and mitigate vulnerabilities. Other times it can help give data to management to ask for resources like security tools and people to manage them.
What is This Article?
This article is a quick and dirty install guide for installing Greenbone Vulnerability Management on Kali Linux. Both have been around for quite some time and are free to install. You can attempt to install Greenbone on any Linux distrubution but Kali tends to be the easier and more stable platform since its very commonly used for vulnerability scanning and management.
What you’ll need
- Kali Linux Iso – https://www.kali.org/downloads/
- A Server (Physical or VM) to install that has 2GB RAM, 1 Core and 20GB HDD space
- Basic understanding of installing Linux
Installing Kali Linux
We won’t get too much into the details of this but if you’re a first time installer, select the Graphical Install and you can’t go too wrong with most of the defaults.
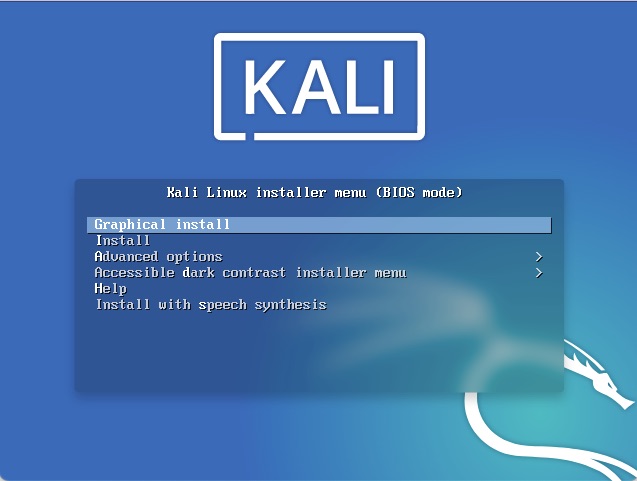
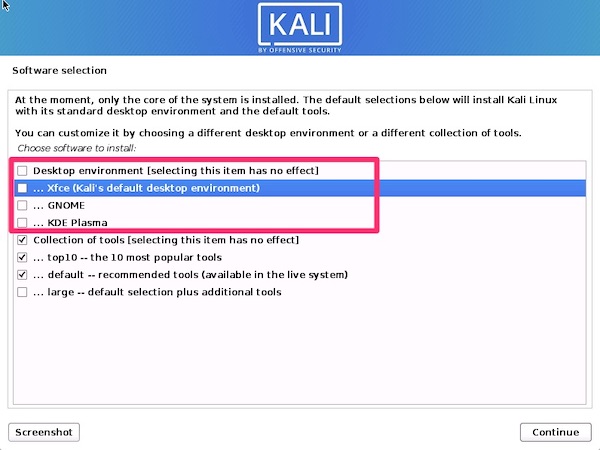
You can install a Desktop but for the purpose of this tutorial, I’ll be using command line so I unselected the Desktops. It saves space and a little compute.
Prepping for Greenbone Vulnerability Management
I always like to start out with a freshly updated operating system. Since Kali is based off Debian we’ll be using apt-get. The first step is to configure network access.
# This will tell us the interface name, most likely eth0
ifconfig -a

# This will allow us to edit the interfaces file
sudo nano /etc/network/interfaces
We can then populate it with eth0 information for DHCP
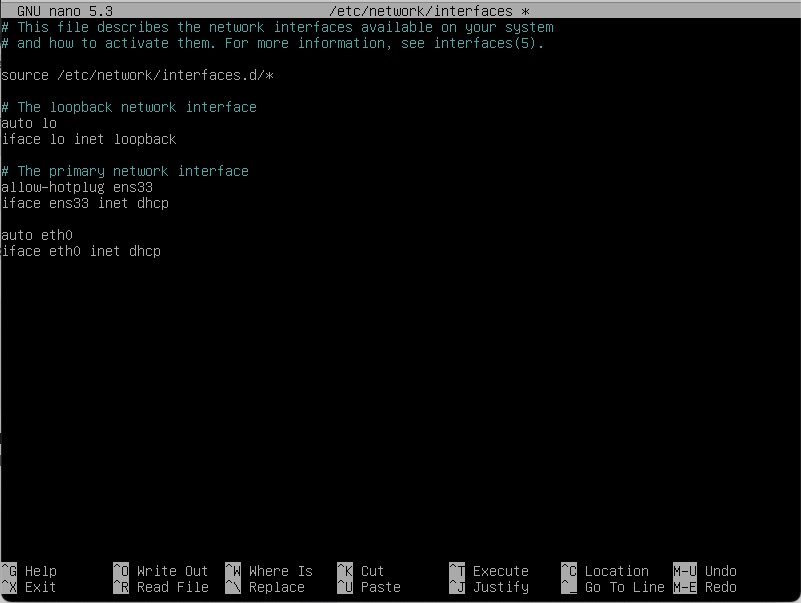
The new lines are the “auto eth0” and “iface eth0 inet dhcp”.
Control X to save and then a “sudo systemctl restart networking” and your ifconfig -a should show an ip address for eth0.
From here we can update the system. Its always best to update before the install to ensure you’re running the latest fixes.
# We're going to switch to root since the next few commands will need to be under that context
sudo su - root

# This command updates the package metadata
apt-get update

# This command performs the actual update
apt-get upgrade

# Reboot when done to start fresh (optional but should be done at some point)
reboot
Depending on your internet connection, this could take a few minutes.
Installing and GVM
Installing is the simplest part.
sudo apt-get install gvmAnd wait a few minutes after answering “Y” to download and install.
Next we’ll run “sudo gvm-setup” which aside from running through the configuration will start pulling down the various feeds. This will take a good 30-40 minutes. It does an rsync on community feeds for CVEs, Vulnerabilities and other scanner options.
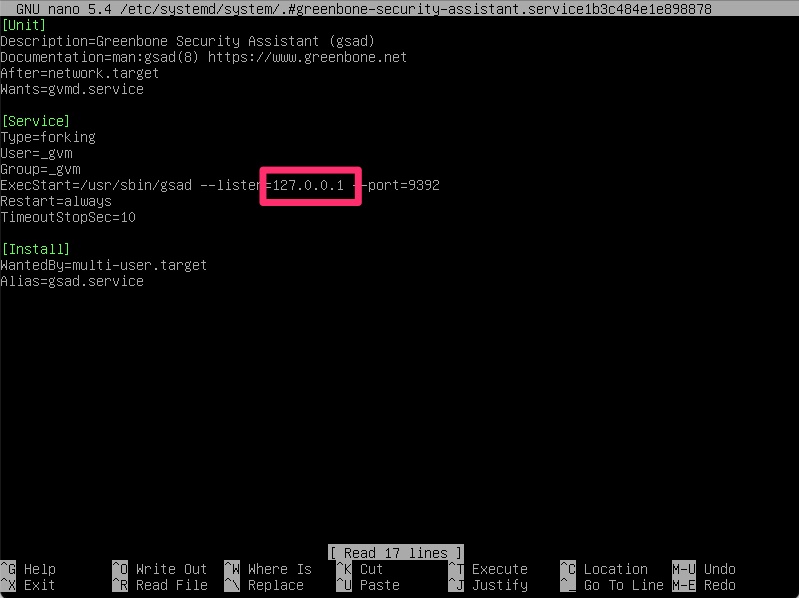
Once it has completed this process, we do need to modify it to listen on 0.0.0.0 instead of 127.0.0.1 so that it is network accessible. Before that though it will output the admin username and password which we need to capture before proceeding. It is randomized for every install and since this install will get blown away after this lab, I’ll share it unfiltered.

We can do that by running the following to edit the systemd startup file
sudo systemctl edit --full greenbone-security-assistantThis 127.0.0.1 needs to change to 0.0.0.0
From here a “sudo gvm-start” is all that is needed.
If all went well you should be able to https:// to the IP of the server on port 9392
With any luck aside from a certificate error the following screen should show up.

Configuring a Scan
Now that we have access to the tool, we need to configure a scan. This starts with configuring a target list. Under Configuration / Targets. Then create a new target
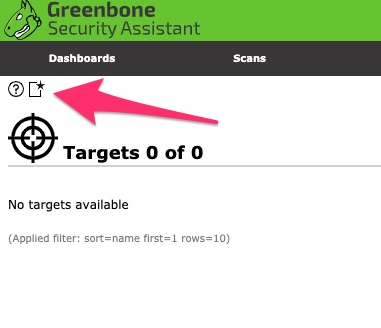
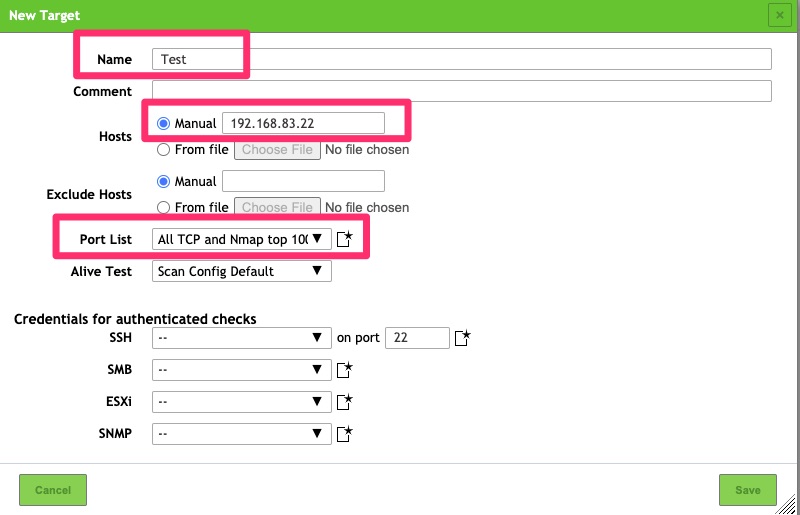
This requires just a few fields entered. The name is fairly self explanatory and is just a name for the targets to be scanned. For the list of hosts, you can list subnets and/or IPs. In this example I picked the scanner itself.
For the PortList, The default can be used but when possible I like to scan All TCP and Nmap top 100 UDP ports as many times applications run on non standard ports.
If you feel comfortable providing your scanner credentials it can login and perform authenticated vulnerability checks as some may not be able to be detected anonymously.
Under Scans / Tasks we want to create a new Scan Task
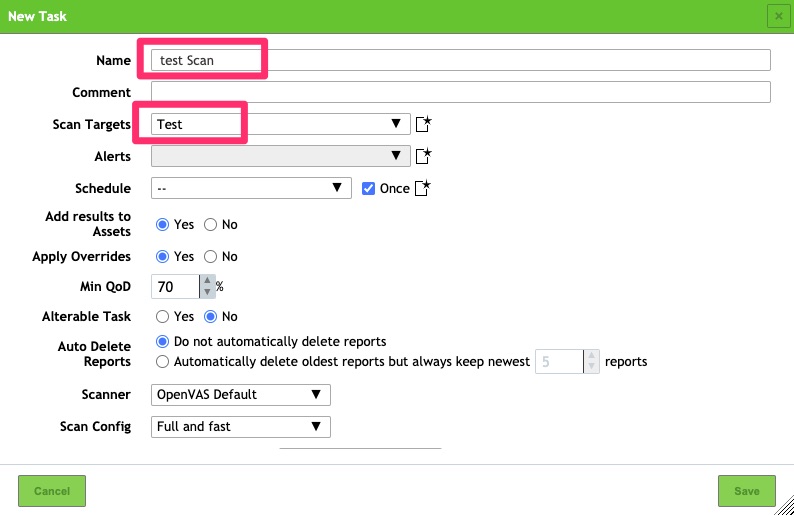
Once that has been created and saved a scan can be kicked off.

When running a scan it can take some time and that is determined by the remote endpoint but it is not uncommon for it to take 30 minutes per IP address depending on how quickly the endpoint can be scanned and what it finds. By default it does have quite a bit of concurrency and in order to fully utilize that you may have to tune your CPU and RAM configurations but that is out of scope for this document.
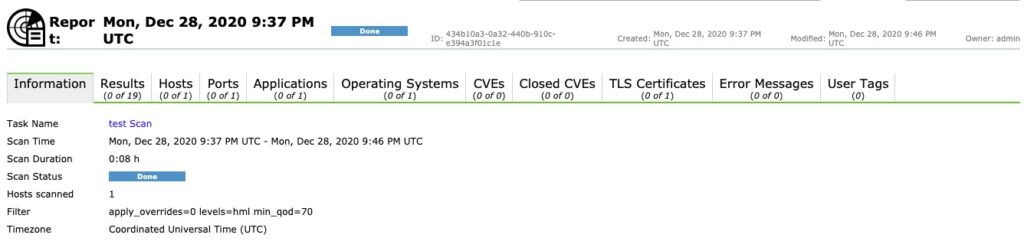
Once a scan is complete you have a report. Unfortunately this scan did not turn up much due to it being already fairly secure but this is what you can expect to see!
Final Words
That is it! You now have a vulnerability scanner you can use to scan your network for vulnerabilities. If you choose to use this for your vulnerability management needs, tweaks will need to be applied to port ranges, hosts and other settings but in a nutshell this is the nuts and bolts of what you need.