How to Cheaply Host Your Business Online

Summary

Hosting your company online could mean a few things to different people. The purpose of this post is to help guide new startups through hosting email, web presence and some other related tools.

About 20 years ago this was a more costly endeavor. There were fewer players and each component cost more. It has been highly commoditized and DNS Hosting is usually free these days.

This will not go into the technical details of doing it. If there is a need for that I am happy to expand on this article. This article simply describes the route to you can take.

Leading By Example

An example I will provide is setting up my wife’s business Pretty Hare Salon. She had a need for online presence, email and online booking for appointments.

Registrar and DNS Hosting

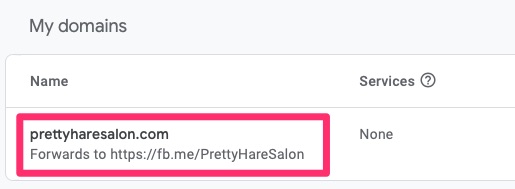
Once she filed her proper paperwork to register her business we were off to searching for a domain name and settled on prettyharesalon.com. Registering with Google Registrar services was easy and it was a mere $12/year for this domain including DNS services.

Some people get confused by the difference between the two. Registrar Services involves reserving the name and pointing to the DNS Hosting provider which in this case is also Google.

Forwarding

A neat feature of Google DNS is that you can do HTTP(S) forwarding. For her business she does not need a published web site as social media suffices for this for the time being. We opted to use HTTPS forwarding for www.prettyharesalon.com and redirect it to her Facebook page. This is a free service Google provides and quite helpful.

Domain forwarding to Facebook

Email

For email, we opted for a personal gmail account to save cost. Google Domains also allows forwarding email from her prettyharesalon.com to her personal account. We have a few addresses that we forward for. Her clients aren’t concerned that the correspondence comes from @prettyharesalon.com as they all know her. With that said, publishing the @prettyharesalon.com email addresses on social media helps greatly to those just finding her business.

If the email forwarding doesn’t work for your business, G Suite (Google’s Platform) offers flexible email hosting starting at roughly $6/month/account. I use that here at Woohoo Services for mine.

Web Site Hosting

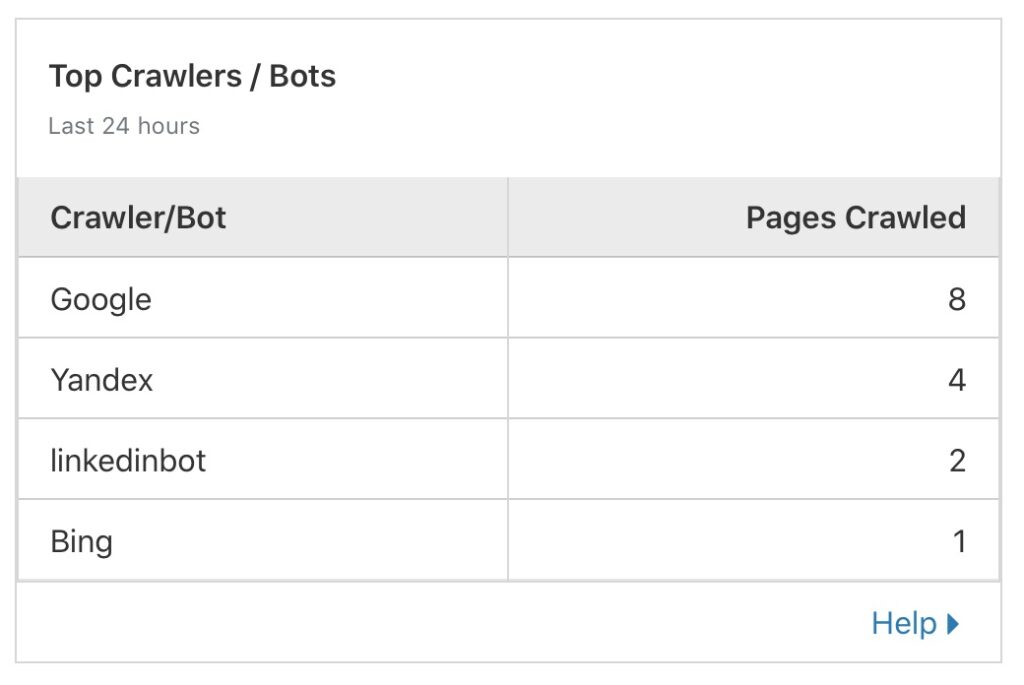
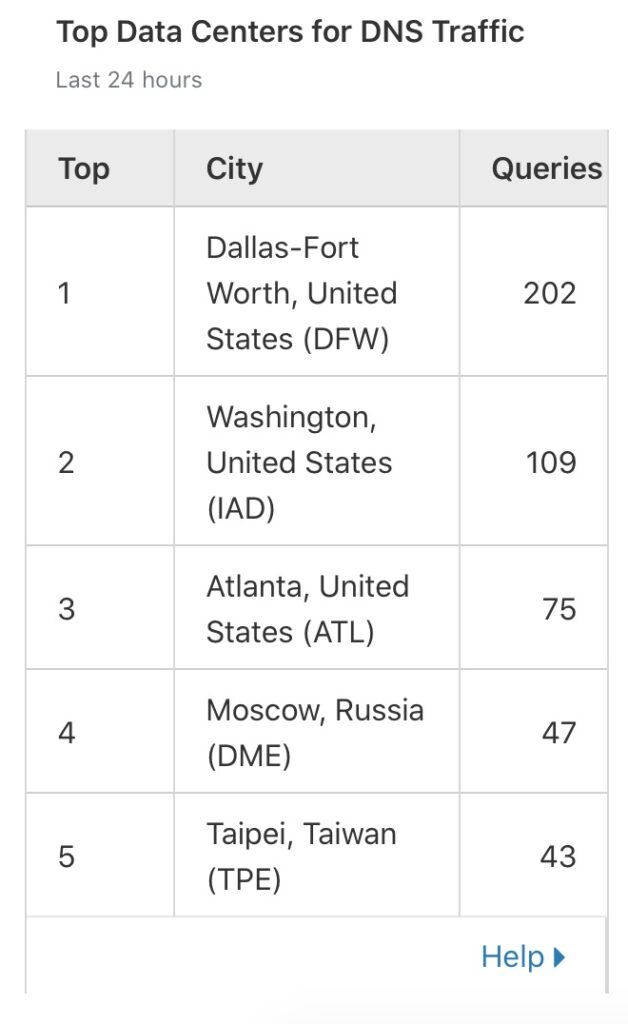
If you do need to host a web site, Google Cloud does have hosting offerings including WordPress and a few others. See my article on how I set this up for this blog if you’re interested. I highly recommend putting CloudFlare or something similar in front of it though. Web sites get scanned and attacked on a daily basis, unbeknownst to the owner. This can damage your reputation.

Wix is another popular web hosting platform that is fairly easy to use.

Online Platform

Square is a great platform for startups that need to accept credit cards but cannot commit to monthly fees. It offers a fairly flat percentage structure on card swipes/dips that are predictable. It also offers free add-ons like the appointment module for businesses that require/prefer appointments and have a set list of services to offer.

Social Media

It goes without saying that social media is a most. It can be a free source of marketing and a great way to keep in touch with your clients. Do not limit yourself to just one though. Get on as many as you believe are relevant to your business. If you have a brick and mortar store, register that business with the major search engines, add your business hours to it, etc. You’d be surprised at how many people exclusively use Yelp or Google. Different people use different social media and its best to try to capture it all.

Unboxing My Keychron K1 v3

Summary

As I was discussing in my Why I Use Keychron For My Mac article, I had ordered a v3. Over time the v1 has not quite held up but I still love the keyboard.

One major annoyance in the v1 was the sleep timeout. Whether it was plugged in or not, it would go to sleep after 10 minutes of idle. There was no way to disable this. Now in the v3 I can. This was important because the bluetooth reconnect sometimes takes a rather long time.

The other issue I was seeing was phantom keys getting pressed or pressing keys and them not producing any results. It was believed this was a problem with the blue mechanical switches. The v3 switched to yellow switches. Only time will tell.

Unboxing Pictures

First – Here is a picture of the K1v3!

K1 v3 - First View
K1 v3 – First View

A common compliant of the shipping process is that the boxes get fairly damaged. While the keyboards themselves do not usually get damaged, sometimes they do. My box had minimal exterior damage but the keyboard was just fine.

Minimal Box Damage
Minimal Box Damage
Slight Box Corner Damage

The box was a little difficult to open due to the way the tape was applied and my lack of knowledge at how the flap was setup. I worked my way through it. I could have just cut right through it but wanted to maintain the integrity of the box.

Difficult Box Tape and Flap
Another Angle of Difficult Box Tape and Flap

What Is In The Box?

The box defaults with Mac key caps on the keyboard but comes with Windows caps and a cap puller tool. A USB-C to USB-A cable which is most likely the most popular requirement for this. Some people are griping its not a USB-C to USB-C but there are many legacy machines out not on USB-C yet. People with USB-C only machines should be stocking up on USB-C cables. A printed user guide is also included but you can always download that online.

Contents of the box.  Key puller, manual, USB-A to C cable, key caps and a keyboard layout diagram.
Contents of the box. Key puller, manual, USB-A to C cable, key caps and a keyboard layout diagram.

Side By Side

Here are some side by side shots.

Brand new v3 on top and worn v1 on the bottom
Profiles are similar but color is slightly different.  If you pay close attention you may be able to pick up the blue switches versus yellow.
Profiles are similar but color is slightly different. If you pay close attention you may be able to pick up the blue switches versus yellow.

Look and Feel

Overall, the look is pretty similar. One issue of the v1 was the placement of the “light” button to control the backlight. It has been relocated and it out of the way of accidental touch which was a problem.

The switches do feel slightly different but they are reactive and responsive. I still get the “joy” out of typing on them that I did with the v1 and like out of a mechanical keyboard.

Final Words

The keyboard seems great so far. I’m happy to support Keychron with my purchases. It will be interesting to see what they come up with next as they are starting to branch out to other accessories as well.

A Beginner’s Guide to SEO From a Beginner

Summary

In my attempt to stand up this blog, I have gone through the Search Engine Optimization (SEO) process. This is the first time I have had to do this in roughly a decade or two. Quite a bit has changed but some things are still the same.

Patience

I started out expecting it to be fairly instant. Refreshing the screens every hour and then daily. The crawling and indexing seemed to run on its own terms.

One of the most important things to have is patience. It takes time for your site to get crawled, even after submitting site maps to various search engines. In today’s world of instant gratification, if it is a new site, it can take days or weeks for your site to get indexed.

Analytics

Analytics are the second most important part of this. You need to be able to measure traffic to your site. Google Analytics is a great thing to inject into your site. It is not the only source of analytics though.

I currently use Cloudflare for this site. CloudFlare is great at providing some analytics as well. I particularly like the ability to see which “crawlers” are going through my site.

Cloudflare crawlers
Cloudflare “crawlers”

Not that it is terribly useful but since my DNS is hosted with Cloudflare, I get some metrics from that. It is neat to see where the queries are coming from.

Top DNS Queries

Analytics can help you determine the format of your information or time of day to release new content. Google Analytics is also great about telling you how you obtained the audience. Do most people see it through your Facebook feed, search or organic directly from your site?

Registering With Search Engines

Search engines need to know about you and your site. One quick way is to submit your site to the major ones. Google (Search Console), Bing (Webmaster) and Yandex (Webmaster) are a great start.

If your pages are not heavily linked to each other, a great idea is to upload a sitemap. This blog has that issue. If you are using a tool like WordPress, Yoast is a great tool to generate these. Yoast dynamically generates the site map.

Validating Site Content

Google Search Console allows you to inspect the URL for issues which can help you pre-empt issues before they get into the index. Here you can see it has actually already crawled the site but not indexed it yet. Still worth a test!

URL Inspection in Google Search Console
URL Inspection in Google Search Console - Live Test
URL Inspection in Google Search Console – Live Test – All “green”

Bing and Yandex have similar tools.

Addressing Issues

Try to resolve any issues the various tools detect fairly quickly. Excessive redirects, bad robots, 4XX or 5XX can cause some “crawl” pains. With limited resources, search engines have to optimize their crawl and allocate a “budget” to each site. Up and coming sites without a reputation have a minimal budget so you do not want issues getting in the way of that.

Focus on Quality Content

Whether your site is fairly static or you are pumping out content, ensure the quality remains. Google and other search engines prioritize original quality content. They also rate on readability and mobile friendliness.

Final Words

Hopefully this has helped you as a very introductory article on SEO. There are plenty of guides that go into much more depth into the various aspects of SEO.

Is Your Office Chair Causing Back Pain?

Summary

Many people in the IT space suffer from back pains at one point or another. 5-10 years ago I thought back pain was just for those that were unhealthy. Then, earlier this year, it hit me. It was pain like no other. Not just muscle pain but felt like “bone on bone” pain. For the first time, I went to a chiropractor. It helped but depending on that did not seem like the long term solution. Here is my journey and thoughts on back pain. Hopefully it can help you!

Over the Years

Over the years I have had the occasional back pain from tense muscles. It usually came from a stressful day and left a day or two later. Exercise and a good night sleep usually fixed it. Sometimes it was as simple as my body telling me it was time for new shoes! Soles of shoes can wear over time and stop providing the support needed.

Doctor Time?

That was until earlier this year I woke up one morning with some absolutely terrible back pain that caused me to go to the chiropractor. After a few sessions of adjustments and deep tissue massage, I was on my way. It was not completely gone but bearable. I kept asking what I could do differently but was repeatedly told me it was just life and to keep coming back. The chiropractor was a highly reputable one so I believed it. Perhaps he was just tired of giving people advice that they never took.

It came back again a few weeks later until I took a family stay-vacation. Some family came into town and I was off work for a week. My back pain was gone so I realized it had something to do with my work routine.

Change it up!

I decided to rotate my mattress and eventually get a new one. I replaced my shoes to see if that helped. These minor changes were making a dent but still not quite doing it. Then I started looking at my chair. It was a typical adjustable task chair but it was about 15-20 years old. My wife on the other-hand had a nice Serta executive chair she inherited from my father. I swapped chairs for 1 day and felt “cured”. It was a miracle!

The Chair!

Upon investigating chairs and doing my research on my own chair, it had a few issues. The chair was fairly old so the padding was pretty shot. It also did not have any lumbar support. That was the primary area of my back pain. The Serta chair, on the other hand, had copious amounts of lumbar support. Knowing it was my chair that was the issue, I sought out finding an economical replacement.

Chair Qualities

As I would come to find out, there were a few qualities of a chair that would help support the back and help to prevent or mitigate back pain

Lumbar Support

What is lumbar and lumbar support? The lumbar is the lower region of the back. It has a natural curve to it.

Spinal Column Anatomy including Lumbar
Spinal Column Anatomy
Taken from – https://www.hopkinsmedicine.org/health/conditions-and-diseases/lumbar-strain-weight-lifters-back

In chairs that do not have lumbar support (curved to match to this), we tend to press up to the back and lose that natural curve. This causes the spin to sit in a way that can cause pain over time. The reason for this is muscles are supporting the back that do not usually do so. Then over more time, we tend to hunch or change positions to more unhealthy positions

Lean Back!

No, its not just a song feating Fat Joe! The ability of a chair to tilt and allow you to lean back allows for the back of the chair to take most of the weight of your upper body off your back and place some of it on the chair. This reduces the strain on back and back muscles.

Armwrests

In terms of mitigating back pain, these are fairly terrible if you spend your day typing on a keyboard. The reason for this also goes along with design flaws in desks. Perhaps flaw is not the right word but a choice of aesthetic over function.

An ideal setup allows for your elbows to be parallel to the desk when sitting so that your arms can rest on the desk comfortably without contorting your shoulders and putting strain on them. The problem with armwrests is they typically prevent you from adjusting your chair to a proper height to allow for that. For this reason I typically remove the arm wrests completely when possible.

Some desks come with drawers under the desk, in the sitting area which cause similar issues. Your chair should be adjusted so that there is a minimal amount of space between the top of your legs and the bottom of the desk to best allow your forearms to be parallel to the desk and resting comfortably.

Adjustable Desks

An adjustable desk helps with this greatly too. Sitting all day or standing all day is bad for your posture. Sit all day and your hips get tight or tense and need to be stretched. Stand all day and your back will definitely hurt. I like the flexibility of an adjustable desk so that I can change positions every few hours.

Not everyone can afford a real adjustable desk so there are cheap “hacks” you can find that will allow you to place your keyboard and monitor on a stand that adjusts on top of your desk. IKEA has some “economical” motorized adjustable desks too for $400 USD

Other Remediations

While I did not want to see a chiropractor long term, deep tissue massage is likely a must for me on some sort of schedule and I highly recommend it.

I find that using a foam roller on my upper back helps tremendously as well as tennis ball. These work wonders to help to work out knots if you cannot get to or afford a deep tissue massage.

Please do be careful with these methods though. You can make your back problems much worse if you do them incorrectly. Many times an out of alignment back can cause these issues so I recommend doing the full foam rolling exercise but leave out your lower back.

Final Words

Sometimes resolving back pain is a matter of finding the silver bullet and changing that one thing. Other times you may have a few life circumstances that are causing it. Be persistent though and hopefully this article has given you a few different areas to investigate!

Here is a great video to help visualize some of the chair mistakes we commonly make.

CheckMK Distributed Monitoring

Summary

The purpose of this guide is to show the strength and flexibility of CheckMK’s distributed monitoring. As you add hosts and services, the requirements can grow. It can be easy to get in the rut of adding more CPU and RAM until you have a monstrosity of a server that you cannot expand anymore.

Centrally monitoring all sites may not even work. The central CheckMK server may not have access to all of the remote devices.

Pre-requisites and Installation

To start off, we will need another CheckMK instance. If you do not already have one, check out the Introduction to CheckMK guide. Once you have CheckMK installed and a new unique site setup, the rest is trivial

Distributed monitoring also involves the slave listening on TCP/6557 so we need to open that up

[root@chckmk2 ~]# firewall-cmd --zone=public --add-port=6557/tcp --permanent
[root@chckmk2 ~]# firewall-cmd --reload

[root@chckmk2 ~]# su - second

OMD[second]:~$ omd config

We then enable distributed monitoring and enable livestatus

omd config - Distributed Monitoring
Select “Distributed Monitoring”
omd livestatus
omd livestatus

Enable livestatus which will listen on port 6557

Configure Connection

From the main site, in our series http://chckmk1.woohoosvcs.com/main navigate to Distributed Monitoring

Distributed Monitoring
New Connection
New Connection
Second connection options
Fill out the appropriate options.
Login to second site
Select the credentials that have access to login to the second site.
Login
Login again!
Save changes
Save changes
Activate
Activate!

Use Connection

Now that we have the connection, how do we actually use it? One of the easiest and likely ways is to have a folder configured just with that monitoring site

New Folder
Create a folder with a monitored site

Next I added a host and put it in this new folder. Here you can see CheckMK is smart enough to know only the “second” site needs to be reloaded due to the changes that only affect it.

Activate second site changes

Final Words

This article was mostly pictures but hopefully the point comes across. That point is how flexible and easy it is to setup distributed monitoring via CheckMK.

Upgrading CheckMK

Summary

In this article we will discuss the upgrade process using OMD. We will also go over the “werks” or changes and incompatibilities in the versions after upgrading.

If you have a fully functional environment such as one installed per Introduction to CheckMK – this should be fairly straight forward.

Prerequisites

CheckMK 1.5 RPM – We downloaded this in the previous article

[root@chckmk1 ~]# curl -O https://checkmk.com/support/1.5.0p23/check-mk-raw-1.5.0p23-el7-38.x86_64.rpm

[root@chckmk1 ~]# yum install check-mk-raw-1.5.0p23-el7-38.x86_64.rpm 

Wait, what just happened? Was that it? Did it just get upgraded? Yes and no. CheckMK 1.5 was installed but our instance is not upgraded to it.

[root@chckmk1 ~]# omd sites
SITE             VERSION          COMMENTS
main             1.4.0p38.cre      

[root@chckmk1 ~]# omd versions
1.4.0p38.cre
1.5.0p23.cre (default)

Each omd instance runs as the user so we will su to main to run commands for that instance

[root@chckmk1 ~]# su - main
OMD[main]:~$ omd update
Please completely stop 'main' before updating it.

# Yes that's a great idea!
OMD[main]:~$ omd stop
OMD[main]:~$ omd update

omd update
“omd update”
OMD[main]:~$ omd version
OMD - Open Monitoring Distribution Version 1.5.0p23.cre
OMD[main]:~$ omd start
Version 1.5.0p23 with “57”

Are we there yet?

We most definitely are. We are on 1.5.0p23 and that went fairly well. But what is the “57”.

Werks

From the CheckMK page a Werk is a bug or change that has an affect on the UI – https://checkmk.de/check_mk-werks.php

We can click on the 57 and there are 57 incompatible “werks” that we should be aware of. Many times these are non issues. Other times it is certain metrics that have gone away or configurations that have changed.

Werks / Release Notes
“Werks” AKA Release Notes

This is a huge help when upgrading. Instead of having to dig through text file release notes to see what major changes happened, we have werks! You can see any incompatible changes here and drilling into them will give you details on what to do. Once you have addressed it, you can acknowledge the werk.

Click on the “Show unacknowledged incompatible werks”

Incompatible Werk
Incompatible werk. Address and acknowledge

As we can see here, there is a clear description of what changed. Once we have addressed, you can acknowledge and the 57 will decrement to 56.

You also have the option on the release notes page to “acknowledge all” if you really do not care to work through the werks. for this lab I have gone through this before and I will just acknowledge all.

If you have a large deployment, most of your time will be spent going through the werks and addressing. With that said, going from 1.4 to 1.5 has been a breeze. 1.2.8 to 1.4 was a bit rougher with more incompatible werks that caused issues.

Rollback

The power of OMD lets rollbacks come fairly easy. OMD does not care if an “upgrade” is going forward or backwards. The only issues you may have is if you made a config change only compatible or implemented in 1.5. In that case, 1.4 may have issues with it. Otherwise the rollback is the same as the upgrade. 1) stop the site 2) omd update

Final Words

Now we have a fairly up to date CheckMK. Try doing the same to 1.6.0? For my production deploys I usually wait for a few revisions and 1.6.0 is still very early for my tastes.

Introduction to CheckMK

Summary

The purpose of this guide is to provide a high level overview of CheckMK. CheckMK is a great monitoring tool that has progressed greatly over the years. I have heavily depended on it for at least 3 years now.

Background

I came across CheckMK on a project that required a shot gun replacement of the current monitoring solution. A few solutions were vetted and Nagios was attempted. Unfortunately, the time to tweak and tune it was not compatible with the project timelines.

About CheckMK

CheckMK is an ecosystem that original was built around nagios. Many of the components of Nagios exist. Mathias Kettner is the founder of CheckMK.

There are quite a few editions but the scope of this is for the “Raw” edition. This is essentially the free unlimited tier.

Installation

Enough of the background, let’s get down to the technical installation

Requirements

For the purposes of this installation, we will be using a vanilla “minimal” install of CentOS 7.0. CentOS 7 is the latest supported version CheckMK supports. The VM will have 1 core, 1GB RAM and 8GB HDD. We will first be installing 1.4.0 so that the upgrade process can be shown.

curl -O https://checkmk.com/support/1.4.0p38/check-mk-raw-1.4.0p38-el7-85.x86_64.rpm

curl -O https://checkmk.com/support/1.5.0p23/check-mk-raw-1.5.0p23-el7-38.x86_64.rpm

# Always good to update first!
yum update

# Enable EPEL package repo
yum install https://dl.fedoraproject.org/pub/epel/epel-release-latest-7.noarch.rpm

# Then attempt to install
yum install check-mk-raw-1.4.0p38-el7-85.x86_64.rpm

Ok, great, ran through all of that. What’s next?

Configuration

Open Monitoring Distribution

CheckMK builds upon a framework called Open Monitoring Distribution (OMD). You may be asking, why the complexity? OMD makes upgrades quite useful and can allow you to run multiple versions of CheckMK on the same machine as OMD also allows multiple instances. The CheckMK rpms install this.

The first step after installing CheckMK will be to create an OMD site

# Here you can see there are no sites
[root@chckmk1 ~]# omd sites
SITE             VERSION          COMMENTS

# We then create a site
[root@chckmk1 ~]# omd create main
Adding /opt/omd/sites/main/tmp to /etc/fstab.
Creating temporary filesystem /omd/sites/main/tmp...OK
Restarting Apache...OK
Created new site main with version 1.4.0p38.cre.

  The site can be started with omd start main.
  The default web UI is available at http://chckmk1.woohoosvcs.com/main/

  The admin user for the web applications is cmkadmin with password: OkWZHNQr
  (It can be changed with 'htpasswd -m ~/etc/htpasswd cmkadmin' as site user.
)
  Please do a su - main for administration of this site.


[root@chckmk1 ~]# omd sites
SITE             VERSION          COMMENTS
main             1.4.0p38.cre     default version 

[root@chckmk1 ~]# omd start main
Starting mkeventd...OK
Starting rrdcached...OK
Starting npcd...OK
Starting nagios...2019-11-02 15:43:45 [6] updating log file index
2019-11-02 15:43:45 [6] updating log file index
OK
Starting dedicated Apache for site main...OK
Initializing Crontab...OK

# Open port 80 with firewalld
[root@chckmk1 ~]# firewall-cmd --zone=public --add-service=http --permanent
success
[root@chckmk1 ~]# firewall-cmd --reload

# Set SELINUX

setsebool -P httpd_can_network_connect 1

If everything went well, you should be able to browse to the IP or URL and get a login page.

CheckMK 1.4.0 Login Page

CheckMK 1.4.0 Login Page

It is really that simple. You now have a working CheckMK instance ready to be configured.

CheckMK Main Page

CheckMK Main Page

Configuring CheckMK Application

Now that we have a working instance and want to actually monitor something, why not the CheckMK server itself? There are a few options for this. You can use SNMP, CheckMK Agent or both. We will go over installing and configuring the agent.

Installing the CheckMK Agent

The agent requires xinetd as it essentially ties a script (the agent) to a socket/tcp port (6556). We will put the agent directly on the checkmk server.

The agents can be found in the “Monitoring Agents” section. For RPM based distributions it is easy to just install the RPM.

[root@chckmk1 ~]# curl -O http://chckmk1.woohoosvcs.com/main/check_mk/agents/check-mk-agent-1.4.0p38-1.noarch.rpm

[root@chckmk1 ~]# yum install check-mk-agent-1.4.0p38-1.noarch.rpm

[root@chckmk1 ~]# netstat -an | grep 6556
tcp6       0      0 :::6556                 :::*                    LISTEN     

Adding Host

Now we get to add the host to CheckMK

New hosts
Go to “Hosts” and then “New host”
Select host monitoring configuration
Enter the Hostname or IP. The agent type defaults to Check_MK Agent but I wanted to point it out. You then want to “Save & go to Services”.
Fix all missing/vanished services
This screen shows all of the services it can monitor. We want to “Fix all missing/vanished” and then save “1 change” which should after this actually change to save “2 changes”.
Activate new changes made
At this point we need to activate those changes. This typically requires a reload of Nagios which the activation does.
Host added but stale host and services
But wait, what am I seeing now and why are those hosts stale?
Some activity
Here we go, some activity!

At this point, we added a host and added some metrics to it. It ran through a discovery and found some more. Many times this happens. This is because some checks run asynchronously in the background. The first time you check a host, it does not return all of the services. On the second run they show up. From here you can go through similar steps to click on the host and acknowledge the new services.

In this case I simply forgot to follow my own instructions and click the “fix button”. Likely more services would have shown up later but not as many in the screenshot.

Other Configurations

Just because we have a monitoring system in place does not mean it is fully configured. We still have notifications, alert levels and many other tuning. Those are out of scope of this document but I will likely generate them going forward.

Final Words

We stood up a Check_MK server from scratch and are monitoring one host. At the beginning of the article I discussed upgrading. I will follow up with another article on upgrading. The process is fairly simple but there

Why I Use Keychron For My Mac

Preface

I was not paid by Keychron or anyone else to write this. This is purely my experience of this keyboard. I would not even call this a technical review. I really like the product and wanted to share.

Summary

A while back, my trusty Apple Bluetooth keyboard failed. Ok, not failed. I poured something on it accidentally. It was quickly replaced with a new Apple keyboard. Unfortunately it used the new butterfly keyboard and felt like typing on chalk. A kickstarter for a mechanical keyboard that had Mac layout support came across one of my social feeds. The options were fairly limited for something with Mac compatible layout. This happened circa November 2018.

It was founded by some keyboard enthusiasts with industry knowledge that decided to start their own company. That is definitely something I can buy into and help support. At the time, it was called Keytron. I believe due to some naming issues they then rebranded as Keychron.

What is a Mechanical Keyboard?

A mechanical keyboard uses mechanical switches. Most of the early keyboards were mechanical. We are talking 1980’s timeframe for those under 25. In the early 1990’s, rubber dome keyboards were fairly common. Very likely due to how cheaply they could be manufactured. If you have ever had to open up a keyboard that does not provide some “clickity clackity”, you would find a rubber mat under the keys.

Here is a good article I came across with images – https://mechanicalkeyboards.com/define_mechanical_keyboard.php

Tom’s hardware also has a great article on optical switches which some of these keyboards are or give you the option of. Optical switches can and do have mechanical parts to them.

Noise

Wouldn’t mechanical keyboards be noisy? Yes they can be depending on the type of mechanical switch. For many people that is part of the nostalgia of it. I learned to type on an Apple IIe and electric typewriter. I was very familiar with mechanical keys and knew what I was in for. It is a common complaint though of someone that has not used one before. If you use it at work, your coworkers are likely to complain too.

The K1

The initial keyboard they offered (model K1) had a few features. Some of those features were 87 key versus 104 key and white backlight versus RGB. I opted for the 87 key RGB. Since it was a kickstarter project, I did not have high expectations of ordering and it showing up next week. I would check up on it every few weeks. It finally shipped early January.

K1 87 Key RGB
Taken from https://www.keychron.com/products/keychron-mechanical-keyboard

My K1

Here are some pictures of how my K1 has faired over the past year. As pictured, it is a bit worn and some of the paint is chipping away but I cannot complain. This was the first iteration of the first keyboard they shipped. Since then, this has been dubbed v1. They are now on K1 v3 which I am happily awaiting shipment of.

It is bluetooth capable and has an internal battery, despite the wire depicted below,. I use the USB-C purely for power to my USB power source.

Keychron K1 v1 above view
Above view of my K1 v1
Side view of K1 v1 Keychron
Side view of K1 v1

Other Models

The K1 was a fairly successful release. With that success, Keychron then released the K2 with quite a few mechanical switch options. I do not claim to know all of the various switches and their strengths and weaknesses. The K2 was designed to be a higher profile option. The low profile switches of the K1 were in high demand and difficult to come by.

K2

The K2 is the current production keyboard actively produced on a regular basis. Due to this, the K1 gets manufactured in batches at this point at various times.

With the K1, it only offered one switch. For the K1 v1 it was the blue switch. For the K2 they decided to give options in addition to the blue switches. I imagine this was in part due to the noise with blue.

It is an 84 key only keyboard.

K4

The K4 is a compact keyboard with many of the same switch options as the K2. It is a compact 104 key keyboard.

Community Grumblings

It wouldn’t be fair to completely ignore this. With it being a new startup there have been some frustrated customers. Particularly around communication and shipping. Sometimes it takes weeks to get updates on the status of orders. In some countries there are unexpected customs taxes that can be rather high.

Not to discount those concerns, I completely understand them. Having started a few businesses, I also understand being a startup and the craziness that goes along with that. In today’s world we are so used to buying off Amazon, having it show up fairly immediately with tracking all along the way.

With all of that said, I do see huge improvements in that area. I recently purchased my K1 v3 online. A mere 4 days later, it shipped and I should have it in a few more days.

UPDATE: It has shown up, check it out here – Unboxing My Keychron K1 v3