Summary
The purpose of this guide is to show the strength and flexibility of CheckMK’s distributed monitoring. As you add hosts and services, the requirements can grow. It can be easy to get in the rut of adding more CPU and RAM until you have a monstrosity of a server that you cannot expand anymore.
Centrally monitoring all sites may not even work. The central CheckMK server may not have access to all of the remote devices.
Pre-requisites and Installation
To start off, we will need another CheckMK instance. If you do not already have one, check out the Introduction to CheckMK guide. Once you have CheckMK installed and a new unique site setup, the rest is trivial
Distributed monitoring also involves the slave listening on TCP/6557 so we need to open that up
[root@chckmk2 ~]# firewall-cmd --zone=public --add-port=6557/tcp --permanent
[root@chckmk2 ~]# firewall-cmd --reload

[root@chckmk2 ~]# su - second

OMD[second]:~$ omd config
We then enable distributed monitoring and enable livestatus
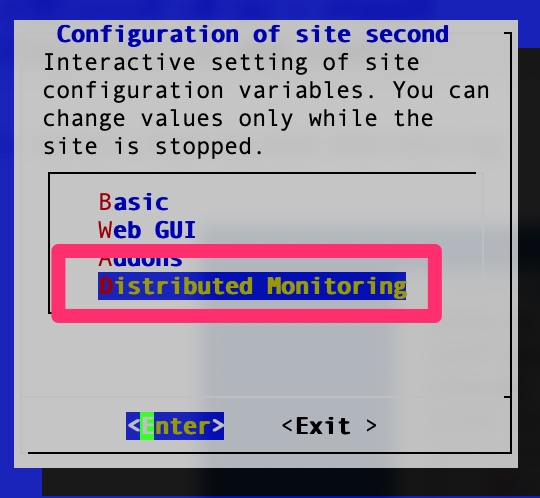
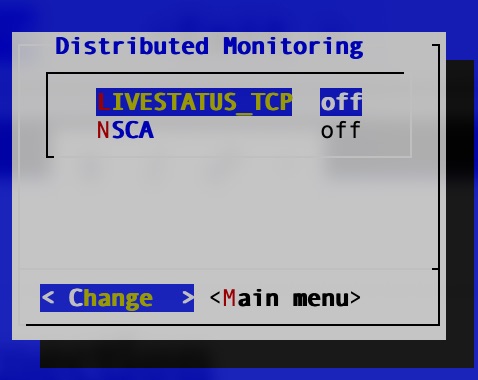
Enable livestatus which will listen on port 6557
Configure Connection
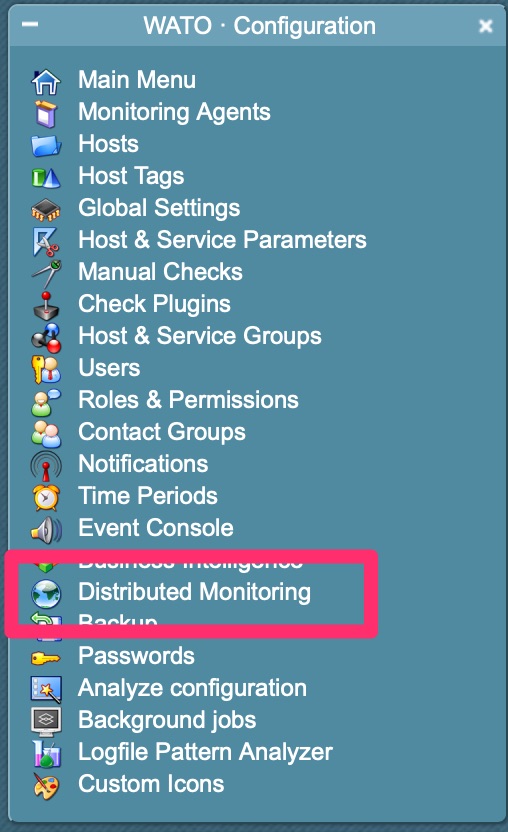
From the main site, in our series http://chckmk1.woohoosvcs.com/main navigate to Distributed Monitoring

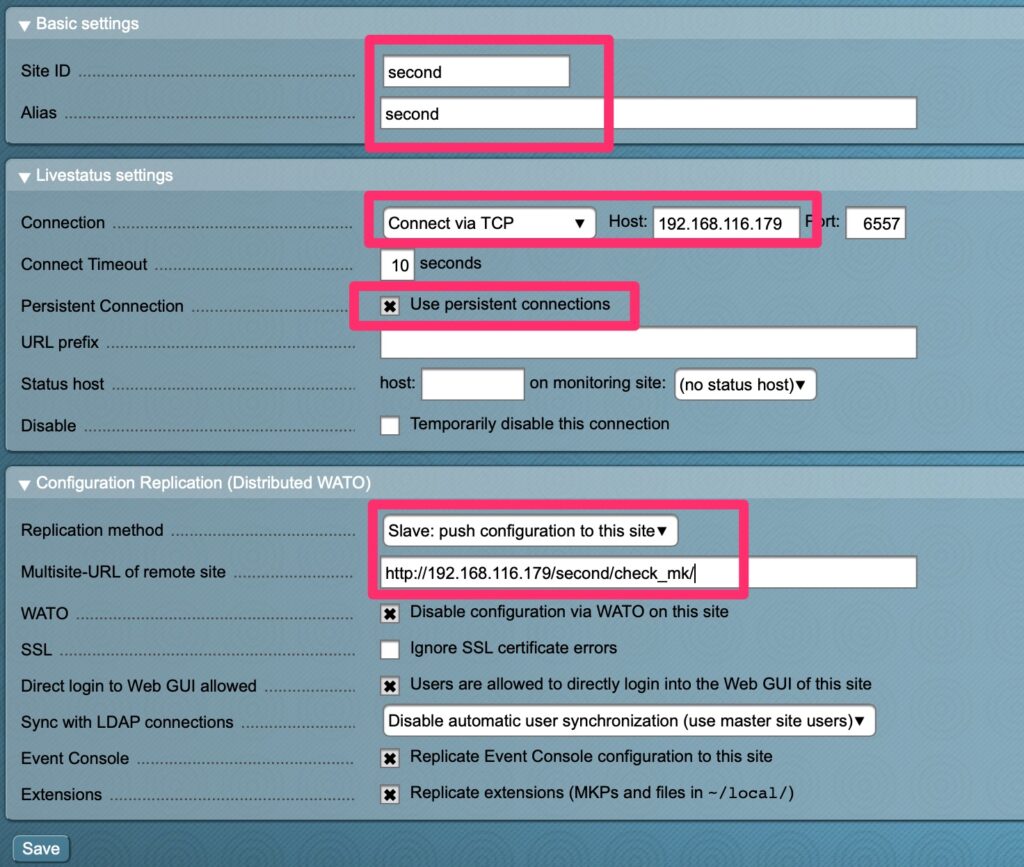

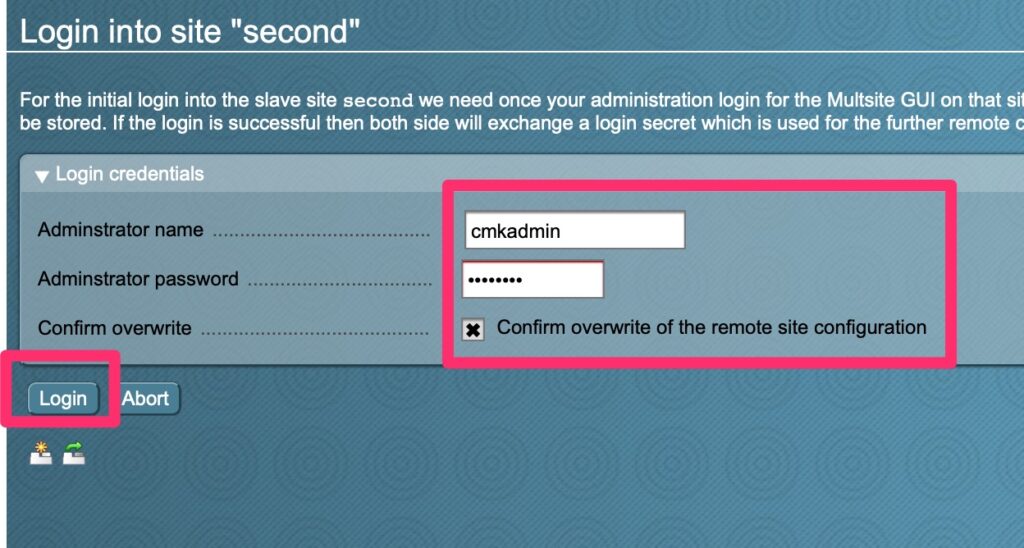

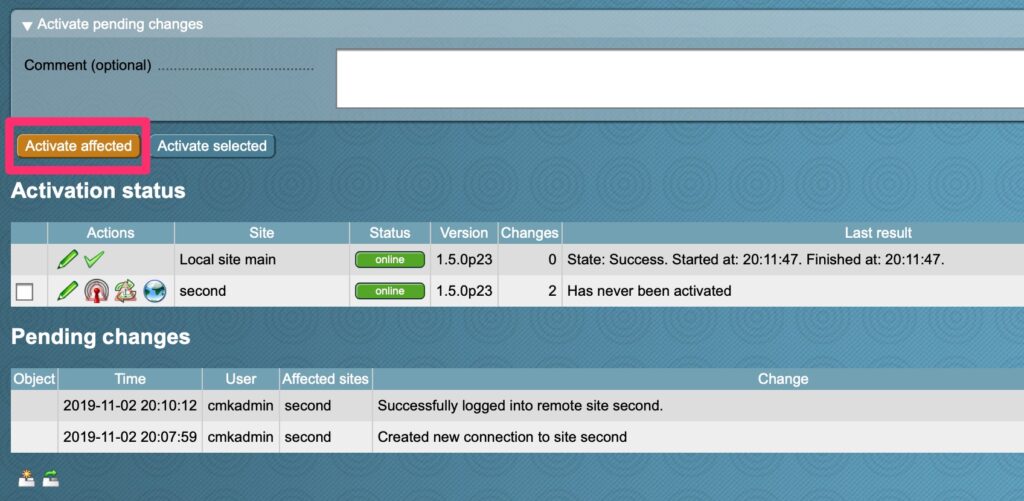
Use Connection
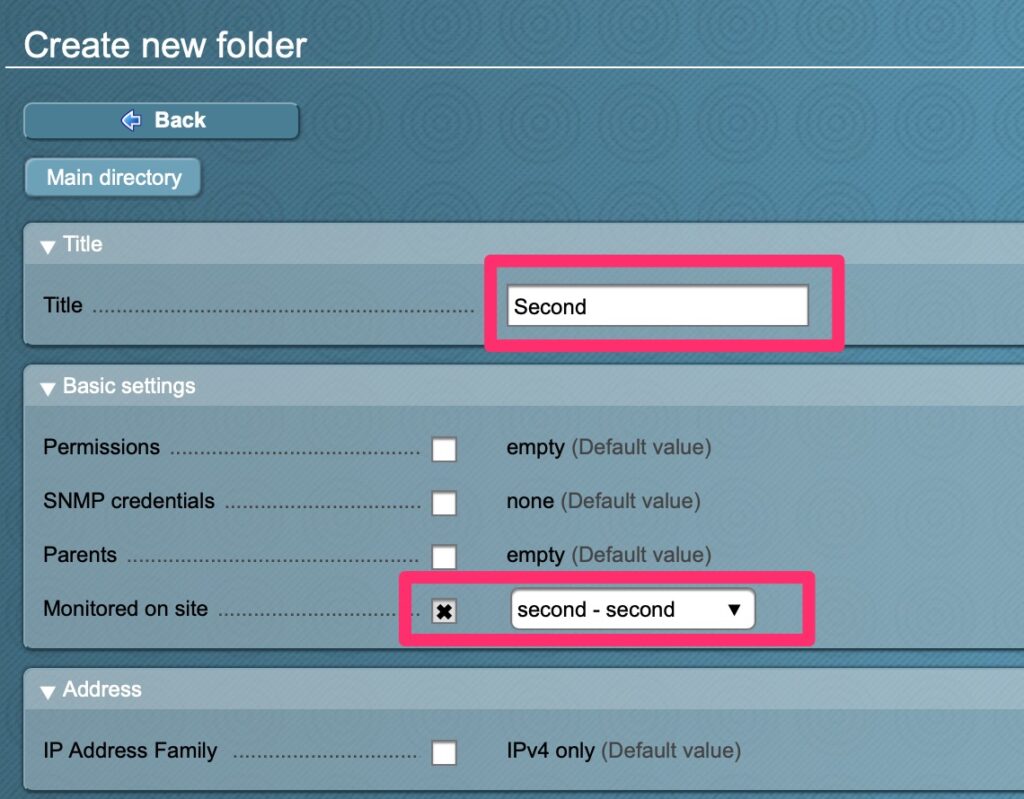
Now that we have the connection, how do we actually use it? One of the easiest and likely ways is to have a folder configured just with that monitoring site
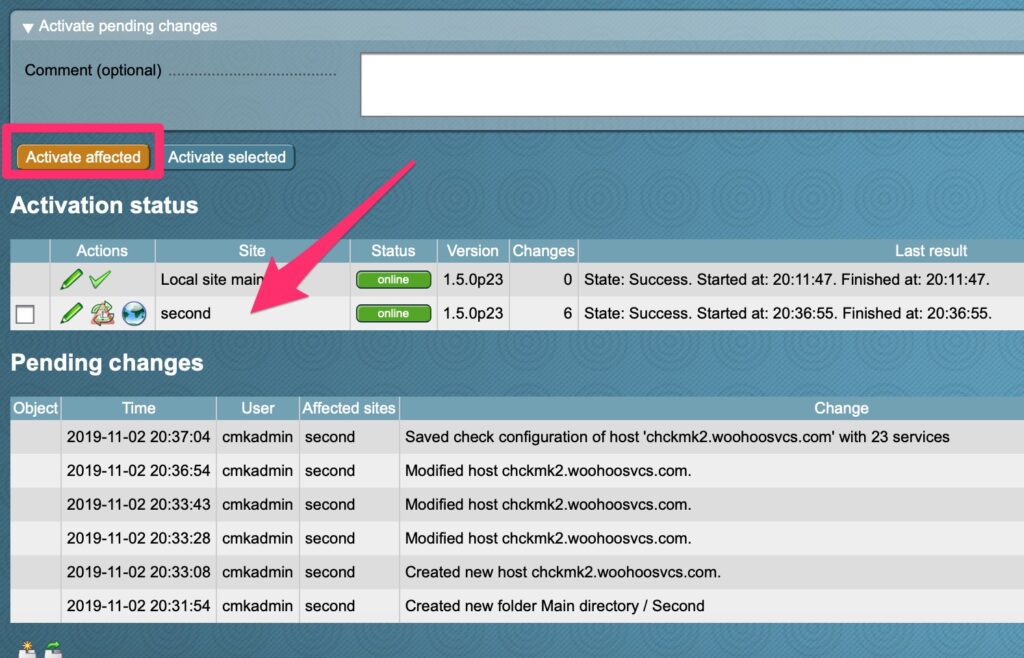
Next I added a host and put it in this new folder. Here you can see CheckMK is smart enough to know only the “second” site needs to be reloaded due to the changes that only affect it.
Final Words
This article was mostly pictures but hopefully the point comes across. That point is how flexible and easy it is to setup distributed monitoring via CheckMK.