Summary and Overview
In fully disclosure, at least at the time of this writing, this blog uses CloudFlare but I am not compensated for mentioning it. I am really a fan of the product. In today’s world, sites and servers exposed to the internet are constantly scanned for vulnerabilities and exploits. I happen to look at such logs on a daily basis and see them constantly in a wide variety of systems.
Exploited and attacked systems can have effects that range from a site or network being brought down to sensitive data being stolen and sold to anywhere in between.
Firewalls are great but traditionally they do not inspect and potentially block traffic. Some do and are great, such as Checkpoint and Palo Alto but many times they have a high barrier to entry and require a traditional infrastructure that allows a physical or virtual appliance to exist.
Firewalls at the edge of your network are not great at dealing with Distributed Denial of Service (DDoS) attacks because everything is funneling to your firewall. If the DDoS saturates your internet connection, their goal is achieved and legitimate traffic gets dropped too.
Also with new encryption, specifically most TLS connections using Diffie Hellman – it is not enough to load the TLS key on to an intermediary device to decrypt. It must actually terminate to the device, whether that’s CloudFlare, F5, CheckPoint, etc.
Why CloudFlare?
Web Security
Appliances and services like CloudFlare are great because they are specialized to understand HTTP transactions and content and with something like CloudFlare that sees a major chunk of the internet traffic their heuristics are fairly good.
This blog for example is just a web site exposed to the internet, so I will use it as an example for setup and benefits.
Pricing and Tiers
CloudFlare has a few different tiers, ranging from free ($0/month), professional ($20/month), business ($200/month) and enterprise($much more/month). Sometimes its difficult to be knowledgeable of which features exist in each addition until you try to implement them and realize you need the next tier up. That is really my only major gripe with it but it does have a free tier so can one really complain?
Distributed Architecture
Their environment is highly distributed so that local denial or distributed denial of service attacks are typically limited to the region they originate. In a truly distributed attack, the nodes closest to the source of the DDoS tend to not get as overloaded because they catch it closer to the source.
This distributed nature combined with their build in caching also greatly increases performance as static content on your site is cached close to where requestors are requesting it. This helps your site scale and mitigates/minimizes the need to spin up more servers closer to the consumers of your web content.
In a fairly static site like this blog, it helps keep hosting costs lower! This page has some good “marketing” documentation on it – https://www.cloudflare.com/cdn/
Beginning Onboarding
Configuration is fairly straight forward. You can sign up online, indicate the domain name. It will then try to pull down your existing DNS records from the existing provider as you will ideally want CloudFlare to host your DNS. This allows it to use AnyCast to provide responses as close to the destination as possible. For those that are a bit skeptical of hosting your DNS with CloudFlare, at the Business level (currently $200/month) you can do a CNAME setup for just domains and subdomains.
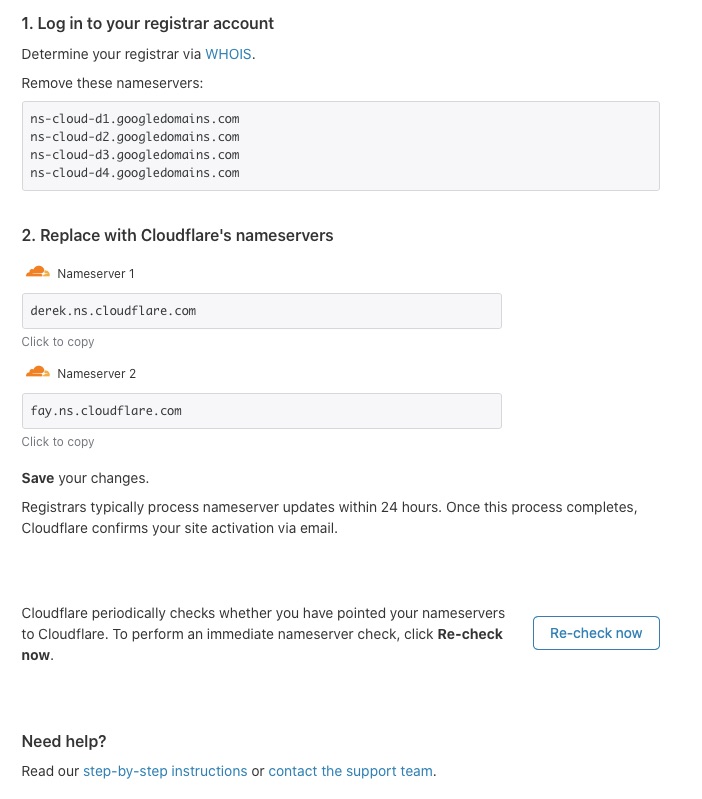
Before you point your NS records to CloudFlare, export your records from the current hosting provider and make sure what CloudFlare has matches up.
All of these entries would normally be public but for proxied entries, CloudFlare will actually point it at one of its termination points and forward to this entry. Its a good idea to keep these private so potential attackers do not know the source of the content and attempt to bypass CloudFlare.
Any records that do not need to go through CloudFlare, click on the “Proxied” status and it will change to DNS only.

Once you point your DNS servers at CloudFlare’s and check, you are most of the way there!
Enabling SSL/TLS
SSL has actually be deprecated and replaced by TLS but it has been around that people still call it TLS. You will see it used interchangeably everhwere. This allows CloudFlare to terminate TLS for you. In the earlier days, all static content was plain text/unecrypted via http/80. These days though browsers start to mark that content as insecure, search engines rank those sites lower and people generally look for the lock in their browser that indicates the site is secure. This is whether the content really needs it. For this reason it is important to enable TLS so that users have a better browsing experience and any potential sensitive data is encrypted. Some examples of that are usernames and passwords when logging into a site.
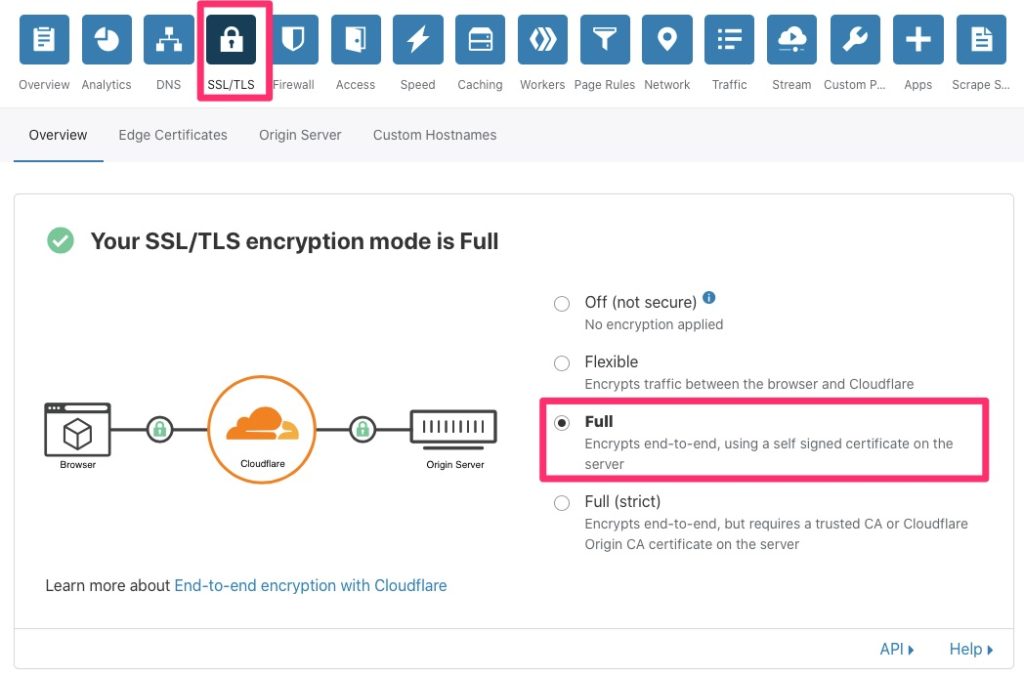
TLS – Full
TLS – Full is the best compromise of all. CloudFlare will issue a certificate to its endpoint, unless you have a custom one you would like to upload. The Business plan is required for custom certificates, otherwise you will get a shared certificate with other random customers of CloudFlare.
Full also encrypts between CloudFlare and your web server/service. This allows end to end encryption. By default CloudFlare will issue a free origin certificate but unless you are in Full (strict) the origin certificate is not validated so it can be a self signed or expired certificate.
Enabling Web Application Firewall
The Web Application Firewall (WAF) is the heart of the protection of CloudFlare. It has a list of protections and vulnerabilities that are enabled based on your needs to better protect your site. In order to help prevent false positives though, it is best to only enable what you need.
You will note that it does require the Professional plan which at the time of this writing is about $20/month.
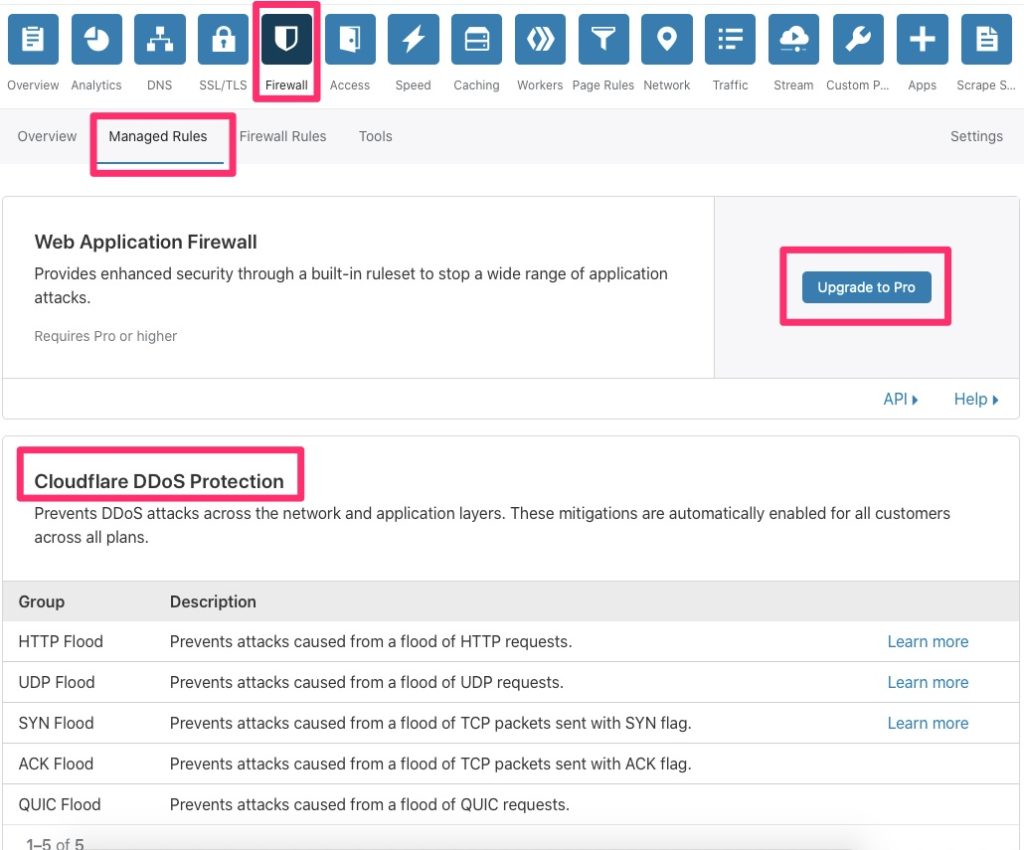
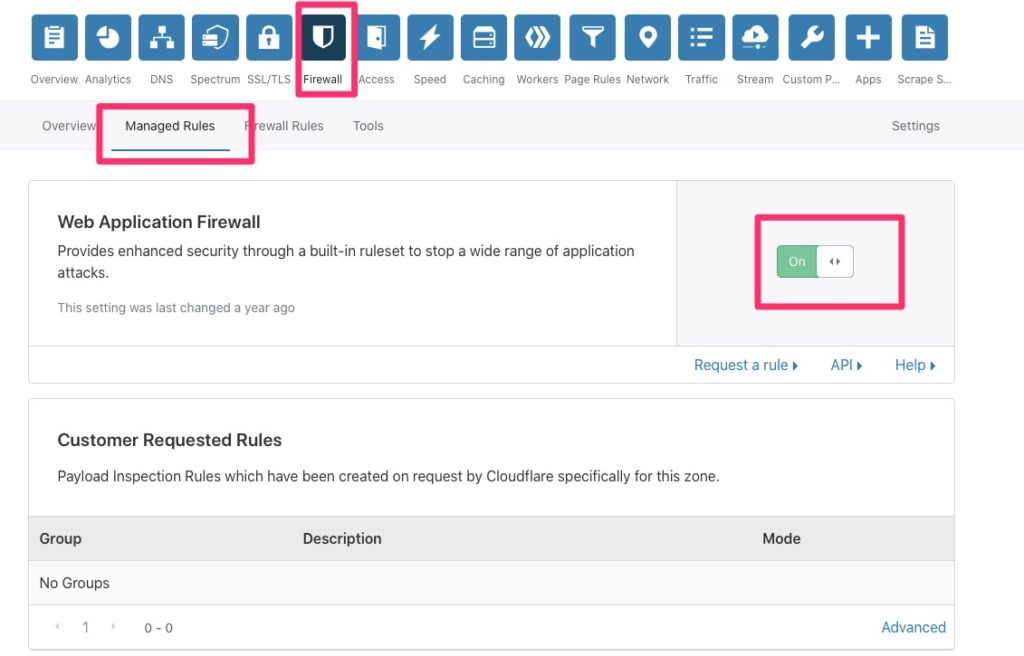
If you opt for Pro or higher, you can enable the WAF via the following option and then enable the individual managed rules that apply to your site.
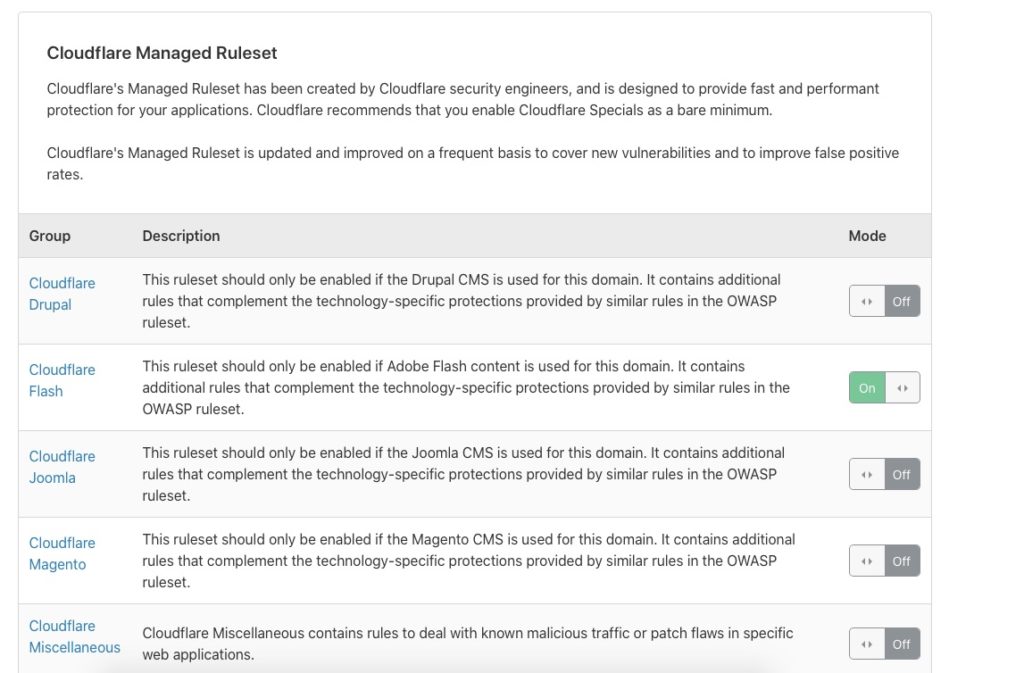
The list goes on and on for a bit so this is not all inclusive.
Securing Your Origin
Once you are completely comfortable with CloudFlare, do not forget to secure your origin. By this I mean setup ACLs to restrict connections to only allow CloudFlare to connect to it. This way malicious parties do not simply bypass CloudFlare. This list is always kept up to date – https://www.cloudflare.com/ips/