Summary
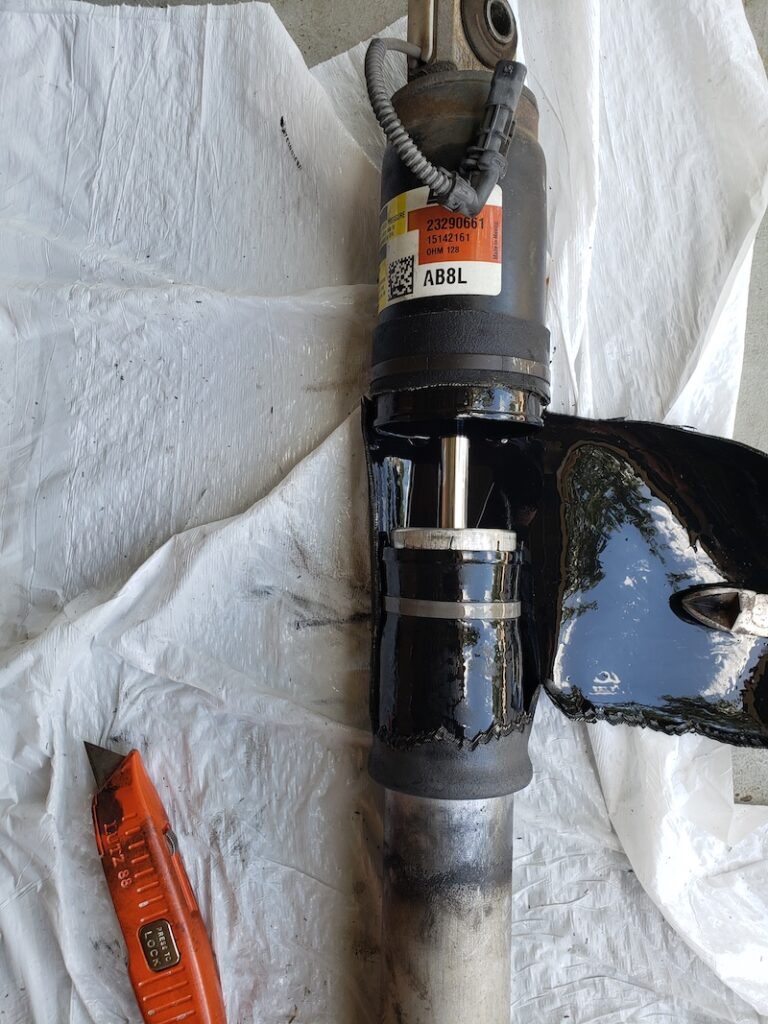
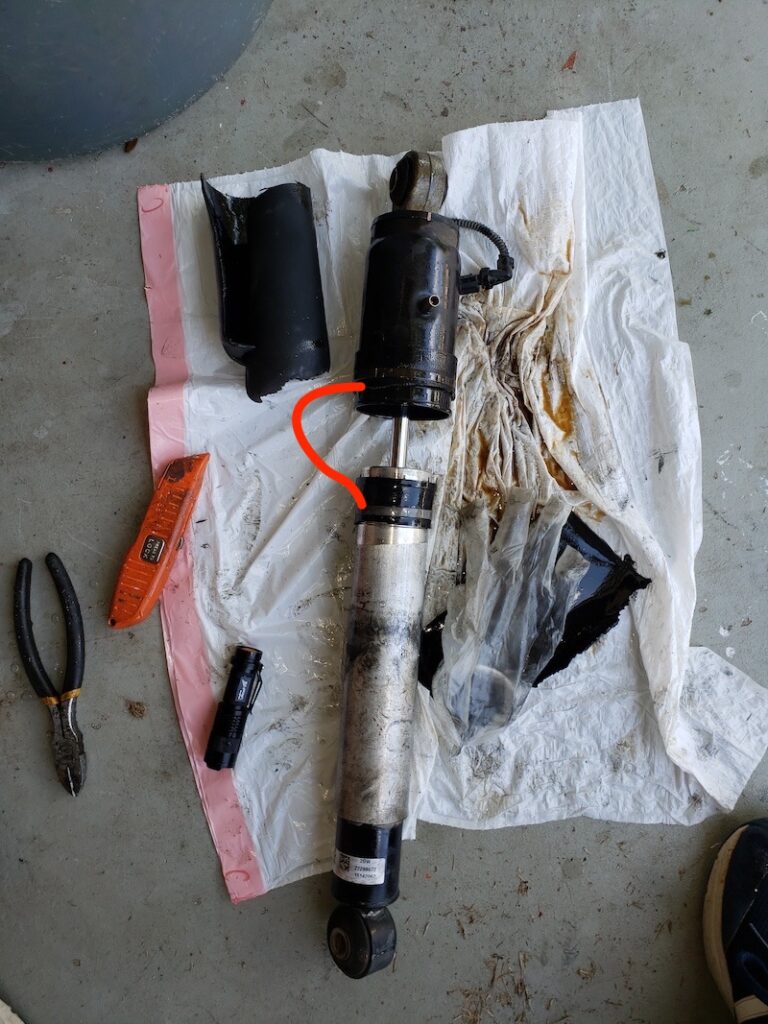
This is another automotive post on my journey through P0711 on my GM 8L90 transmission for my 2015 Yukon. It is on the K2XX platform. At 5 years old it is starting to get some mileage and wear as seen in GMT K2XX Magnetic Ride Control Shock Inspection.
Background
Monday morning I was out for a drive. With COVID all around us, I find I don’t get out of the house often. My truck still needs some miles on it or it would just sit for a while. All of a sudden I look down and notice the check engine light. I think this is the first time I have actually seen one on my truck. Despite being 5 years old, it only has 38k miles on it.
I’m fairly technical and like to do my own diagnostics when possible. I do it so that I can speak intelligently to the repair shop(dealer in this case). My truck was in the shop a few days on and off last week for some tire issues so I also wanted to avoid an unnecessary visit.
Diagnostic
Recently I acquired a Foxwell NT510 Elite. Its a pretty useful bidirectional scan tool. Bidirectional means it can not only read codes but it can do active tests as well and minor calibration resets. It seems to have most of the features of the more expensive ones but it is locked/licensed by the vehicle brand and usually comes with one brand free. In my case GM. You can purchase other brands and add them to the unit. On this model its a lifetime purchase which is nice.
In my case, I checked the codes starting with the ECM and had a P0700 – Transmission Control Module Requested MIL Illumination. This simply told me to check the Transmission Control Module which showed me P0711 – Transmission Fluid Temperature Sensor Performance. Here is a good link someone on www.gm-trucks.com shared with me – https://www.dtcdecode.com/GMC/P0711
The TCM wants to know transmission temp so it can make informed decisions on shift pressures. It will also do things like not lock up the torque converter clutch if it is too cold. I imagine the shift adapts require certain temperature ranges too, to learn properly.
Doing a bit of reading, seems many people have had failed Transmission Fluid Temperature (TFT) Sensors and they just fail. This was more so on the 2016 models which switched to a 1 piece hardness that encompassed the sensor.
On my dash, if in tow mode, I can tell TFT and it was showing a value. Using my scantool, it showed -40F originally but that ended up being a firmware bug and Foxwell sent me an updated code which fixed it. Cold ambient temp from letting it sit over night seemed in line with TFT. Monitoring it further though, the transmission never warms up to the recommended 195-200F. It also had a few cases where the temp dipped to 100 on the dash (lowest number).
Transmission Thermostat
On the 6L80 and 8L90 series, they introduced a thermostat to help increase the temperature to around 200 on daily driving. It is supposed to support better shifts. Others have said it also helps boil off the moisture which has been a huge problem for these transmissions. There is a small subset of people that feel this is too warm and they actually “delete” the thermostat to make it run cool constantly. They are either in much hotter climates or don’t believe the engineers at GM did it right. There is an old line of thinking that 200F will cook a transmission. They could be right but the warning temp on my dash indicates 300 and these newer fluids are supposed to easily get into the 240-250’s. Nobody on the forums with a properly working transmission seems to hit anywhere above 220 though and that’s under extreme loads. Normally the thermostat opens at 192 and any transmission cooler helps keep it down from much above that.
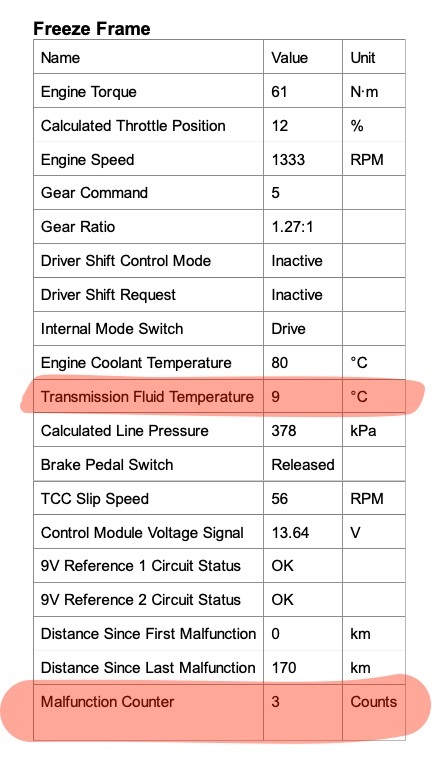
Freeze Frame
In any case, after clearing the codes one day, the next day only P0711 returned. It requires a second time to trigger before check engine shows up. I realized my Foxwell supports reading Freeze Frame. Its kind of like a black box but under less severe circumstances. In instances where certain codes are set, it will capture parameters that surrounded it. In my case I lucked out and it captured a 48F degree TFT which is definitely out of line
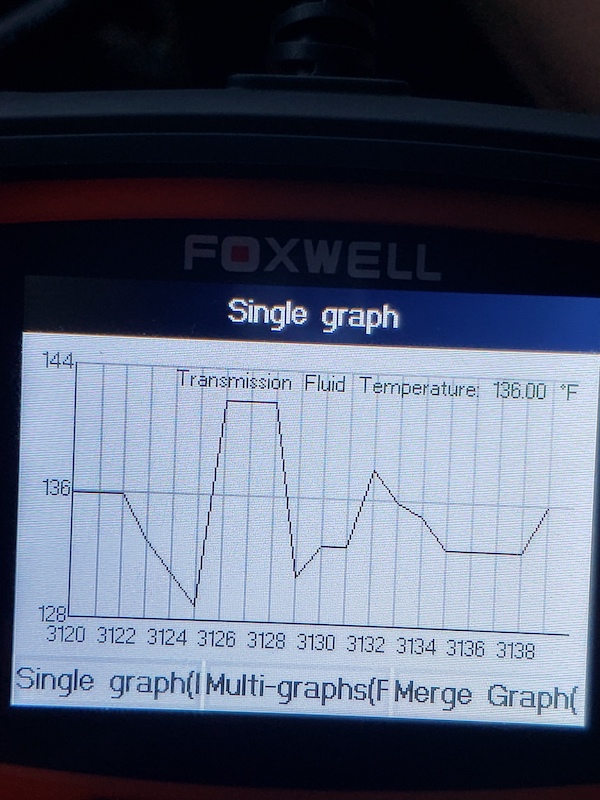
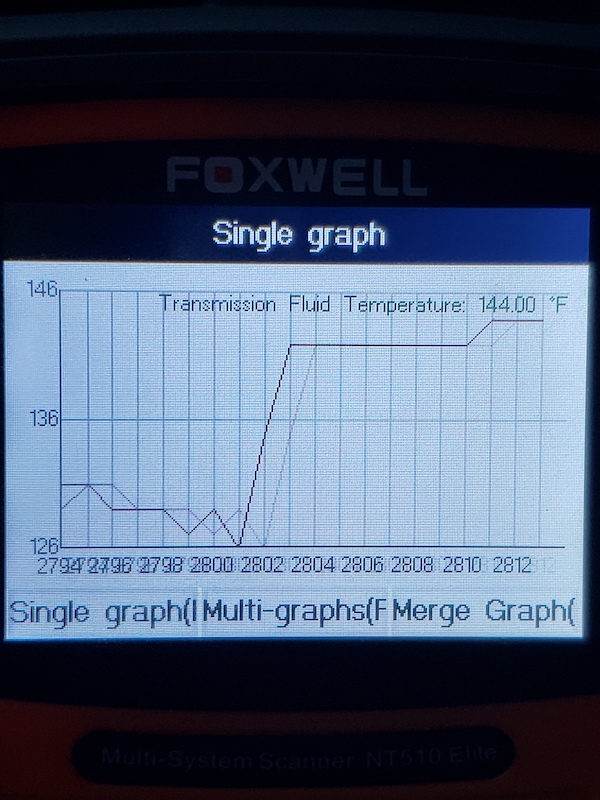
Graphing
I was even able to graph the temperature over the drive. It does seem like there is a bit of fluctuation but that could be because its not allowed to warm up with a possibly malfunctioning thermostat. Or the harness could be loose. Or the sensor could be inaccurate!
Replacing Transmission Fluid Temperature Sensor
There are quite a few videos on this. Here is a great one if you have the one piece harness, whereas at this time I think they switched back to the two piece which is less involved.
Conclusion
Since I have a GM Protection Plan (extended warranty), I’m not terribly interested in possibly voiding it. I also don’t have the expertise or comfort level to start toying with the transmission itself as the temperature sensor is in the pan. Appointment to the dealer made and I may update this Monday with the results. Regardless, anyone that gets a P0711 on a K2 platform on the 8L90 or even 6L80 transmission, this may help you diagnose it if you’re out of warranty. It could be an economical sensor/harness or even an easier to replace thermostat.